

How To Clean A Stain Brush
You can get rid of almost all stains with simple products from around the house. But first, a few words of caution.
Don't go trying any of these removal solutions before reading my general Stain Removal Tips.
Note: New stains are always being added so please check back regularly.
Contents
- Ballpoint Pen
- Ballpoint Pen Stain Removal from Clothes & Fabrics
- Ballpoint Pen Stain Removal from Carpets & Upholstery
- Bleach
- Bleach Stain Removal from Clothes & Fabrics
- Bleach Stain Removal from Carpets & Upholstery
- Blood
- Blood Stain Removal from Clothes & Fabrics
- Blood Stain Removal from Carpets & Upholstery
- Blueberry
- Blueberry Stain Removal from Clothes & Fabrics
- Blueberry Stain Removal from Carpets & Upholstery
- Butter
- Butter Stain Removal from Clothes & Fabrics
- Butter Stain Removal from Carpets & Upholstery
- Candle Wax
- Candle Wax Stain Removal from Clothes & Fabrics
- Candle Wax Stain Removal from Carpets & Upholstery
- Chocolate
- Chocolate Stain Removal from Clothes & Fabrics
- Chocolate Stain Removal from Carpets & Upholstery
- Coffee
- Coffee Stain Removal from Clothes & Fabrics
- Coffee Stain Removal from Carpets & Upholstery
- Concrete
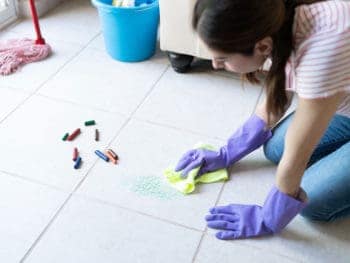
- Crayon
- Crayon Stain Removal from Clothes & Fabrics
- Crayon Stain Removal from Carpets & Upholstery
- Curry
- Curry Stain Removal from Clothes & Fabrics
- Curry Stain Removal from Carpets & Upholstery
- Deodorant
- Deodorant Stain Removal from Clothes & Fabrics
- Feces
- Feces Stain Removal from Clothes & Fabrics
- Feces Stain Removal from Carpets & Upholstery
- Furniture
- Ballpoint Ink
- Beer and Alcohol
- Berry Stains
- Candle Wax
- Coffee or Cola
- Glue and Adhesive
- Grease (Auto) and Motor Oil
- Gum
- Nail Polish
- Paint
- Rust
- Shoe Polish
- Wine
- Grass
- Grass Stain Removal from Clothes & Fabrics
- Grass Stain Removal from Carpets & Upholstery
- Grease
- Grease Stain Removal from Clothes & Fabrics
- Grease Stain Removal from Carpets & Upholstery
- Gum
- Chewing Gum Stain Removal from Clothes & Fabrics
- Chewing Gum Stain Removal from Carpets & Upholstery
- Hair Dye
- Hair Dye Stain Removal from Clothes & Fabrics
- Hair Dye Stain Removal from Carpets & Upholstery
- Hard Water
- Hydrogen Peroxide
- Hydrogen Peroxide Stain Removal from Clothes & Fabrics
- Hydrogen Peroxide Stain Removal from Carpets & Upholstery
- Ink (Ballpoint, Permanent, Water-Based)
- Ballpoint Pen Stains
- Permanent Marker Stains
- Felt Tip Pen / Magic Marker Stains
- Iodine
- Iodine Stain Removal from Clothes & Fabrics
- Iodine Stain Removal from Carpets & Upholstery
- Ketchup
- Ketchup Stain Removal from Clothes & Fabrics
- Ketchup Stain Removal from Carpets & Upholstery
- Leather
- Lipstick
- Lipstick Stain Removal from Clothes & Fabrics
- Lipstick Stain Removal from Carpets & Upholstery
- Marble
- Mattress
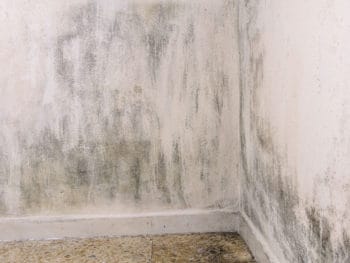
- Mildew
- Mildew Stain Removal from Clothes & Fabrics
- Mildew Stain Removal from Carpets & Upholstery
- Mildew Stain Removal from Tiles
- Mold
- Mustard
- Mustard Stain Removal from Clothes & Fabrics
- Mustard Stain Removal from Carpets & Upholstery
- Nail Polish
- Nail Polish Stain Removal from Clothes & Fabrics
- Nail Polish Stain Removal from Carpets & Upholstery
- Oil (Motor, Cooking, Olive)
- Paint (Water-Based, Oil-Based)
- Permanent Marker
- Permanent Marker Ink Stain Removal from Clothes & Fabrics
- Permanent Marker Ink Stain Removal from Carpets & Upholstery
- Permanent Marker Stain Removal from a Hard Surface (such as wood, paneling, or tile)
- Pets
- Urine Pet Stain Removal
- Feces Pet Stain Removal
- Pollen
- Lily Pollen Stain Removal from Clothes & Fabrics
- Lily Pollen Stain Removal from Carpets & Upholstery
- Red Wine
- Red Wine Stain Removal from Clothes & Fabrics
- Red Wine Stain Removal from Carpets & Upholstery
- Red Wine Stain Removal from Walls
- Roof
- Rug
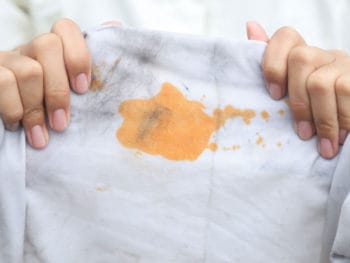
- Rust
- Rust Stain Removal from Clothes & Fabrics
- Rust Stain Removal from Carpets & Upholstery
- Semen
- Semen Stain Removal from Clothes & Fabrics
- Semen Stain Removal from Carpets & Upholstery
- Shoe Polish
- Shoe Polish Stain Removal from Clothes & Fabrics
- Shoe Polish Stain Removal from Carpets & Upholstery
- Silk
- Soda
- Soda Stain Removal from Clothes & Fabrics
- Soda Stain Removal from Carpets & Upholstery
- Sunscreen
- Sunscreen Stain Removal from Clothes & Fabrics
- Sunscreen Stain Removal from Carpets & Upholstery
- Sweat
- Sweat Stain Removal from Clothes & Fabrics
- Tar
- Tar Stain Removal from Clothes & Fabrics
- Tar Stain Removal from Carpets & Upholstery
- Tea
- Tea Stain Removal from Clothes & Fabrics
- Tea Stain Removal from Carpets & Upholstery
- Toilet
- Urine
- Urine Stain Removal from Clothes & Fabrics
- Urine Stain Removal from Carpets & Upholstery
- Water
- Water Stain Removal from Clothes & Fabrics
- Water Stain Removal from Carpets & Upholstery
- Wine
- White Wine Stain Removal
- Red Wine Stain Removal
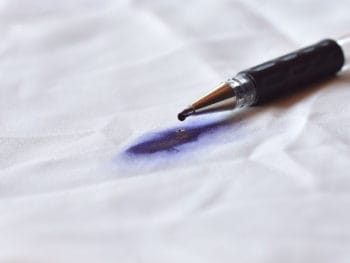
Ballpoint Pen
Ballpoint pen ink is not something that you can usually remove with simple soap and water, but there is an easy and inexpensive way to remove stains of biro ink – Ballpoint Pen Spot Removal Solutions

A pen in which the point is a fine ball bearing that rotates against a supply of semisolid ink in a cartridge.
To most of the world, Biro is still the generic name for the ballpoint pen. When ballpoint pens were first sold in 1945, they were priced at a whopping $12 a piece.
Most people need to write every day, all year long, thus ballpoint pen stains may occur anywhere, any day of the year. The knees of jeans seem to be popular spots for a line of blue ink. Another spot ballpoint pen stains are generally found is on or around the breast pockets of dress shirts or suit jackets, due to the fondness of ballpoints to leak or break in the pocket. Ink spots may also be found on desks, tables, and walls.
Ballpoint Pen Stain Removal from Clothes & Fabrics
Solution 1:
1. Stain should be placed face down on white paper towels.
2. Sponge with rubbing or denatured alcohol or dry-cleaning solvent, or rub detergent into stained area.
3. Repeat if some stain remains.
4. Rinse; launder.
Solution 2:
1. Soak one pad of cotton wool in methylated spirits.
2. With the methylated spirits pad under the stain and a clean cotton wool pad on top, dab the stain.
3. When some of the stain has transferred to the top pad, turn it over so it's clean side is in contact with the fabric and repeat.
4. Change the top pad and continue working until no stain comes through.
5. Wash as usual.
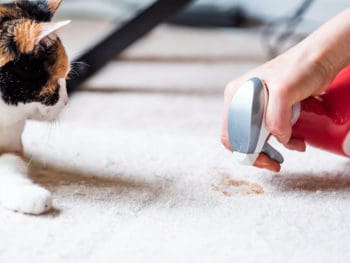
Ballpoint Pen Stain Removal from Carpets & Upholstery
Solution 1:
1. Sponge with a dry cloth and methylated spirits, or a small amount of dry-cleaning solvent.
2. Next, sponge with mild detergent (1 teaspoon neutral detergent – that is, no alkalis or bleaches – in 1 cup lukewarm water).
3. Finally, sponge with clean water.
Solution 2:
1. Spray hair spray onto the ballpoint pen stain to soften the ink.
2. Blot the wet hair spray with a white cloth or paper towel.
3. Repeat until stain disappears and allow carpet to dry.
4. Once dry, hand brush the area gently and vacuum any dried hair spray.
Bleach
The removal of bleach stains is more akin to restoring the color that has been lost, either by stripping away the damaged fabric on a molecular level, or by fading the color of the surrounding fabric to blend in the bleach stain – Bleach Spot Removal Solutions
A chemical agent that makes things white or colorless. Bleach stains are one of the most paradoxical, because they're usually acquired when cleaning or when working to remove another stain. A popular brand of bleach in the United States is Clorox.
Since there is always laundry to do, and since there are many stubborn stains that are best treated with bleach, bleach stains may present themselves at any time of year.
Bleach is a dangerous substance that can stain in any number of ways, in any number of areas. If using the bleach as a spot cleaner, you may find that it has removed more than just the color of the offending stain. If you are bleaching an entire load of laundry, chances for accidentally staining socks, colored T-shirts, or a stray pair of pants increase. Because bleach is often sold in large jugs, it tends to splatter when being poured, often staining shirts or pants.
Bleach Stain Removal from Clothes & Fabrics
Solution 1:
1. Mix 1 tablespoon of sodium thiosulfate with one cup of warm water.
2. Using a clean white cloth, sponge the stain with the sodium thiosulfate solution.
3. Blot until the liquid is absorbed.
4. Repeat Steps 2 and 3 until the stain disappears.
5. Launder.
Solution 2:
1. Rinse the back of the stain immediately and thoroughly with cold water to neutralize the acid.
2. Place the garment on an absorbent cloth and sponge well with ammonia, starting from the outside of the stain's edge. (If treating stains on wool or silk, dilute ammonia with an equal amount of cold water to remove bleach stains.)
3. Replace cloth underneath as it becomes saturated.
4. If ammonia is not available, substitute a baking soda paste, mixing baking soda and water at a ratio of approximately 3 to 1. Rub onto stain.
5. Rinse well.
6. Repeat as needed.
7. Launder according to garment label.
Bleach Stain Removal from Carpets & Upholstery
Solution 1:
1. Mix 1 tablespoon of liquid hand dishwashing detergent with two cups of warm water.
2. Using a clean white cloth, sponge the stain with the detergent solution.
3. Blot until the liquid is absorbed.
4. Repeat Steps 2 and 3 until the stain disappears or is no longer absorbed into the cloth.
5. If the stain remains, mix one tablespoon of white vinegar with two cups of warm water. Sponge the stain with the solution. Blot until the liquid is absorbed.
6. Sponge with cold water and blot dry.
Solution 2:
1. Sponge the stain immediately with cold water to remove as much acid as possible.
2. Mix baking soda and water to make a paste at a ratio of approximately 3 to 1 and scrub into stain with an old toothbrush, then let dry.
3. Repeat steps 1 and 2 until you have removed as much stain as possible.
4. Vacuum.
Blood
There are a lot of different ways one can create a stain by accident, and one of the toughest ones to get out is a blood stain. If you get blood on your carpet or clothing, don't worry. With patience and diligence, you can remove any trace of it – Blood Spot Removal Solutions
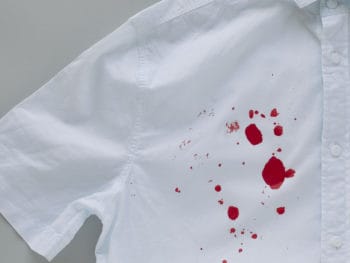
The fluid that circulates in the principal vascular system of human beings and other vertebrates, in humans consisting of plasma in which the red blood cells, white blood cells, and platelets are suspended. Blood is one of the most precious substances in the world; it enables us to stay alive.
Unfortunately, blood stains are not limited by season. Humans run the risk of stains from this precious fluid at every turn, in cases of accidental scrapes, cuts and scratches. Women of childbearing age know to guard against bloody stains for about one week each month.
Blood can reach any area of any garment, and sometimes even furniture or carpeting. Some especially vulnerable places include the knees and elbows of children's clothes, as scrapes are common in these areas. Blood stains can happen at any time of the day or night.
Blood Stain Removal from Clothes & Fabrics
Solution 1:
1. Blot the stain with cold water.
2. Then blot with a mild liquid dishwashing detergent mixed with water.
3. Flush thoroughly with water.
4. If the spot persists, try removing blood stains by mixing the detergent and water with a couple drops of ammonia.
5. Flush thoroughly with water.
6. If the stain still won't go away, and the fabric is colorfast, soak it in an enzyme-containing product. Test for colorfastness first on an inconspicuous spot.
7. Flush thoroughly with water.
Solution 2:
1. For a fresh blood stain, soak in cold salty water.
2. Follow with a vinegar wash if necessary.
3. For dried blood stains, make up a borax and water paste and apply it to the stain.
4. Let it dry, then brush clean.
Blood Stain Removal from Carpets & Upholstery
Solution 1:
1. Blot up as much as you can with paper towel.
2. Mix 1/4 teaspoon clear dishwashing detergent and 1 cup lukewarm water.
3. Blot with paper towel from the outside to the center of the stain.
4. Repeat blotting until the paper towel no longer picks up the stain.
5. Rinse with clear water.
6. If the stain is gone, place white paper towels over the area and weight down, changing towels periodically until the area is dry.
7. If the stain is stubborn, try a solution of 2 tablespoons nonsudsing ammonia with 1 cup lukewarm water.
8. Rinse and blot as mentioned previously.
9. Immediately follow with a mixture of 1 cup white vinegar and 2 cups water to neutralize the ammonia.
10. Blot and rinse as mentioned previously, and weight down paper towels over the stain until dry.
Solution 2:
1. Blot with cloth or paper towels.
2. Use cold water working it into the pile.
3. Blot again and repeat as necessary.
4. If this does not work, try to remove blood stains by sponging with mild detergent (1 teaspoon neutral detergent – that is, no alkalis or bleaches – in 1 cup lukewarm water).
5. Then sponge with ammonia solution (1 tablespoon household ammonia in 1/2 cup water).
6. Sponge rinse with cold water.
Blueberry
Don't panic when a piece of blueberry pie splashes onto your new white pants or cream colored carpet. Successful blueberry stain removal can be accomplished by trying a few of these strategies – Blueberry Spot Removal Solutions
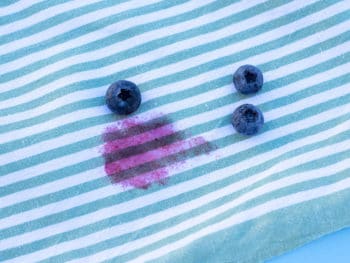
The fruit of any of numerous plants of the genus Vaccinium, having white to reddish, urn-shaped or tubular flowers and edible blue to blue-black berries. Berries comprise any number of foods, such as strawberries, blueberries, raspberries, blackberries, and cranberries. Botanically speaking, a "true" berry has seeds on the inside, not on the outside. Therefore, "true" berries include the grape, tomato, and eggplant but not the raspberry, blackberry, or strawberry.
The fruit of any of numerous plants of the genus Vaccinium, having white to reddish, urn-shaped or tubular flowers and edible blue to blue-black berries. Berries comprise any number of foods, such as strawberries, blueberries, raspberries, blackberries, and cranberries. Botanically speaking, a "true" berry has seeds on the inside, not on the outside. Therefore, "true" berries include the grape, tomato, and eggplant but not the raspberry, blackberry, or strawberry.
Blueberry Stain Removal from Clothes & Fabrics
Solution 1:
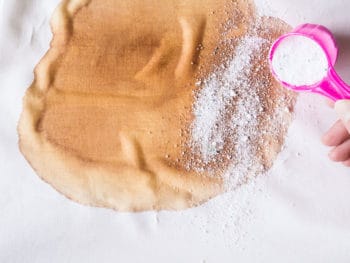
For fresh berry stains on fabric:
1. Treat the stain as soon as possible. Use a dull knife or spoon to remove as much as possible. If you cannot treat the stain immediately, sprinkle it with salt.
2. Rinse any remaining stain well with cold water.
3. Rub liquid laundry detergent into the stain. Do not use bar or natural soap of any kind on the fabric or the stain will set.
4. Let stand several minutes, then rinse the back of the stain well in hot water, letting the water pass quickly through the fabric.
5. If the stain remains, stretch the stained fabric stain-side down over a basin. Boil 3 or more cups of water and carefully pour over the stain from a height of 1 to 2 feet. (This may require 2 people.) This procedure will force the stain through the fabric. If you're the only one on stain duty, run the faucet water as hot as possible and carefully hold the stain under it.
6. If the stain remains, apply a laundry presoak (spot stain remover) and launder with liquid enzyme detergent.
7. If the stain remains, sponge it with a light bleach solution, such as equal parts white vinegar and water. Rinse well and let dry in sunlight. Repeat as needed until no more stain can be removed.
8. Apply laundry presoak and relaunder with enzyme detergent.
9. If the stain remains, rub enzyme detergent into the stain and soak in water up to 1 hour or until the stain is removed. Rinse well and launder.
Solution 2:
For dried stains on fabric:
1. Make a paste of borax and water (at a ratio of approximately 3 to 1) and spread onto the stain.
2. Let stand 15 minutes, then rinse. If borax is not available, rub glycerin into the stain and let stand for 1 hour. Rinse.
3. See steps 3 through 9 for fresh stains, above.
Blueberry Stain Removal from Carpets & Upholstery
Solution 1:
1. Mix 1 tablespoon of liquid hand dishwashing detergent with 2 cups of warm water.
2. Using a clean white cloth, sponge the stain with the detergent solution.
3. Blot until the liquid is absorbed.
4. Repeat Steps 2 and 3 until the stain disappears or is no longer absorbed into the cloth.
5. If the spot remains, mix one tablespoon of ammonia with 2 cups of cold water to remove blueberry stains.
6. Sponge the stain with the ammonia solution.
7. Blot until the liquid is absorbed.
8. Sponge with cold water and blot dry.
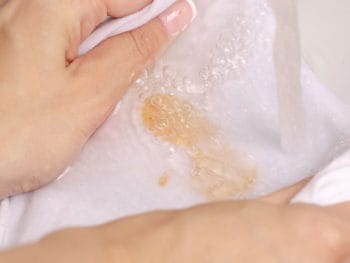
Butter
Because butter is often used during cooking and as a popular condiment, it creates a greater chance of stains. You can follow a few simple steps to remove butter spots from almost any surface – Butter Spot Removal Solutions
A fatty substance produced by agitating or churning cream; used as a cooking medium, ingredient, and topping. Butter and margarine are ubiquitous – either is used in just about every prepared food on the market. They are also found in almost every ingredient list in every cook book in circulation.
Whether poured on popcorn, spread on holiday baked goods, or slathered on corn on the cob, you cannot escape removing butter stains at any time of the year. Butter and margarine are tricky and can stain unsuspecting victims almost anywhere. Remember to get extra napkins at the movie theater, or you'll be in grave danger of having to remove butter stains from the lap area of your pants. Melted butter can drip from popcorn, crab legs, baked potatoes, and corn on the cob.
Butter Stain Removal from Clothes & Fabrics
Solution 1:
1. Scrape off any solid concentration of butter with a dull edge, such as the back of a knife.
2. On washable fabrics, work in undiluted dishwashing liquid, wash and dry.
3. If the stain is old, spray it with WD-40 Lubricant to regenerate the grease, then work in undiluted dishwashing liquid and wash in the hottest water possible for that fabric type.
Solution 2:
1. Use a dull knife or spoon to remove as much as possible.
2. Apply a laundry presoak (spot stain remover) and let stand for several minutes to allow it to penetrate fabric.
3. Rub liquid enzyme detergent into the stain and let stand for several minutes.
4. Launder in the hottest water safe for the fabric.
Butter Stain Removal from Carpets & Upholstery
Solution 1:
1. Sprinkle with an absorbent powder such as baking soda or talcum powder. Let stand several hours.
2. Vacuum. Repeat until you have removed as much stain as possible.
3. If the stain remains, shampoo with a liquid carpet detergent according to manufacturer's directions. Or sprinkle with dry carpet-cleaning powder, let stand several hours, and then vacuum.
Solution 2:
1. Sponge with a small amount of dry-cleaning solvent. Blot.
2. Sponge with mild detergent (1 teaspoon neutral detergent – that is, no alkalis or bleaches – in 1 cup lukewarm water). Blot.
Candle Wax
Candlelight sets a romantic mood. That's until candle wax suddenly drips on your carpet or your sleeve as you reach for your date's hand. You need to quickly get rid of the wax stain so you can get the mood back on track – Candle Wax Spot Removal Solutions

A substance secreted by bees in constructing their honeycomb, molded, embedded with a wick, often scented and dyed, and lit by humans to provide light and/or aroma. Candles are burned throughout the year for their warm glow and pleasing scents at romantic dinners and parties alike.
Dripping wax can be quite far-reaching, especially when the candle itself is being blown out. Too forceful an exhalation and the hot wax will splatter everywhere. The most common time for a wax stain to develop is after dark, when romance is in the air.
Candle Wax Stain Removal from Clothes & Fabrics
Solution 1:
1. Harden with ice, then remove surface wax with a dull knife.
2. Place wax stain between clean paper towels and press with a warm iron.
3. Replace paper towels regularly to absorb more wax and to prevent transferring the stain.
4. Place stain face down on clean paper towels.
5. Sponge remaining stain with a pre-wash stain remover or dry-cleaning fluid; blot with paper towels.
6. Let dry, then launder.
7. If any color remains, re-launder with a bleach that is safe for that fabric.
Candle Wax Stain Removal from Carpets & Upholstery
Solution 1:
1. Use ice to harden the wax, then scrape it off with a dull knife.
2. Place a clean white towel or paper towel over dried candle wax.
3. Run an iron set on low over towel.
4. Repeat using a clean area of the towel until all the wax is gone.
Chocolate
Chocolate's a tasty treat when it makes it into your mouth, but it's also a sticky mess when it doesn't (Let's hope that doesn't happen too often). We'll help removing stains from that sticky mess if you promise to work on your aim – Chocolate Spot Removal Solutions
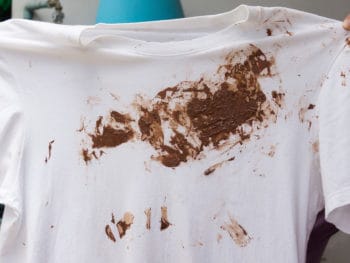
Fermented, roasted, shelled, and ground cacao seeds, often combined with a sweetener or flavoring agent. In its nearly three thousand year old history, chocolate has been more than just a popular dessert or snack. It has served as a medicinal tonic, religious symbol, currency, and even aphrodisiac. Today 600,000 tons of chocolate are consumed in the world each year.
A chocolate stain can appear in any season but is especially prevalent near holidays – particularly Christmas, Halloween, and Easter. For women in particular, there is an increased chance of chocolate stains following a break-up. It is common to remove chocolate stains from the fronts of blouses and shirts, but they aren't confined to those spots. Chocolate ice cream can travel as far as the pants, skirt or shoes. A chocolate stain will likely appear at dessert time.
Chocolate Stain Removal from Clothes & Fabrics
Solution for Milk Chocolate:
1. Blot the stain with cold water.
2. If stain remains, blot with mild laundry detergent and water.
3. Rinse thoroughly with water.
4. If the stain persists, blot it with the detergent and water solution, with a few drops of ammonia added.
5. Rinse thoroughly with water.
6. If the stain persists, try blotting with an enzyme-based detergent.
Solution for Dark Chocolate:
1. Perform the first 2 steps above.
2. Rinse thoroughly with water.
3. If the stain persists, then mix some white vinegar with the detergent and water, and blot.
4. Rinse thoroughly with water.
5. As a final step for removing dark chocolate stains, try blotting the spot with a small amount of hydrogen peroxide.
Chocolate Stain Removal from Carpets & Upholstery
Solution 1:
1. To remove a chocolate stain, sponge with mild detergent (1 teaspoon neutral detergent – that is, no alkalis or bleaches – in 1 cup lukewarm water).
2. Next, sponge with ammonia solution (1 tablespoon household ammonia in ½ cup water).
3. Repeat step 1.
4. Sponge with clean water.
Solution 2:
1. Saturate the stained area with ½ cup of hydrogen peroxide mixed with 1 teaspoon of ammonia.
2. Allow to sit for 20 minutes, and then blot.
3. Repeat this process until stain is removed.
4. Flush the area with club soda and blot.
Coffee
They are as inevitable as morning's arrival. Everyone has had their slippery experiences with scalding coffee. And they can leave scars: the type that need to be removed – Coffee Spot Removal Solutions

A beverage made by percolation, infusion, or decoction from the roasted and ground seeds of a coffee plant. Coffee has earned a special place among the favorite beverages worldwide, due in large part to its chemical makeup. Coffee contains a high percentage of caffeine, a substance that can help enforce alertness.
The call to remove coffee stains is not affected by season, as coffee is available year-round and many people swear by it as the only remedy for morning or afternoon sleepiness. Stains are often found between the legs of commuters, on furniture, jackets, coats and the fronts of blouses and shirts.
Removing coffee stains is not limited to any time of day or night. Hot coffee is an essential part of the morning ritual for many people. Some folks are so addicted to coffee that they'll continue to drink it all day and into the night.
If you spill coffee on yourself at work or some other place where you can't get to cleaning supplies right away, flush the stain immediately with cool water. It may be all you need to do.
Coffee Stain Removal from Clothes & Fabrics
Solution 1:
For black coffee stains –
1. Blot the stain with cool water.
2. Rinse thoroughly with water.
3. If the stain persists, try blotting with some mild laundry detergent and water.
4. Rinse thoroughly with water.
5. Still there? Blot that stubborn stain with detergent and water, this time mixed with a few drops of white vinegar.
6. Rinse thoroughly.
7. As a final step, try some hydrogen peroxide.
Solution 2:
For coffee stains with milk or cream –
1. Use the first 2 steps from Solution 1.
2. Blot the stain with mild laundry detergent mixed with a few drops of ammonia.
3. Rinse thoroughly.
4. Finally, blot with an enzyme-based detergent.
Coffee Stain Removal from Carpets & Upholstery
Solution 1:
1. Mix 1 teaspoon of a neutral detergent (a mild detergent containing no alkalis or bleaches) with a cup of lukewarm water. Blot.
2. Mix 1/3 cup of white household vinegar with 2/3 cup of water. Blot.
3. Sponge with clean water. Blot.
Solution 2:
1. Spray with soda water, then soak up liquid with a towel or absorbent paper.
2. Or, soak up liquid with a towel or absorbent paper, then sprinkle with salt or bicarb soda to absorb the fluid.
3. Vacuum when completely dry.
4. Sponge with a borax solution if the carpet has stained. Alternatively, sponge with vinegar.
Concrete
The essential first step for concrete stain removal is to determine what caused the grime or stain, if you can, and then act fast. The longer an untreated stain stays on concrete, the more likely it is to seep in and become part of the whole – Concrete Spot Removal Solutions
The longer an untreated stain stays on concrete, the more likely it is to seep in and become part of the whole.
Methods vary on how to remove concrete stains, but the fact is that cleaning up that garage floor, patio, path, driveway or other concrete is an essential part of regular home maintenance.
Clean concrete at least once a year. Before you start, be sure to protect adjacent glass, metal, wood, plants or other decorative materials with a tarpaulin or old shower curtain. Try one of the following methods for removing concrete stains listed in order of increasing power. Always test the method on an obscure spot to make sure it works. Never use a metallic brush on concrete, as metallic fibers can get trapped in the concrete, where they'll rust.
If the concrete is old and crumbly, brush it lightly with a soft brush. If that doesn't do the trick, try warm water and mild detergent, adding white vinegar to the water if the dirt and stains persist.
Wet the concrete with warm water and let it absorb the water a bit. Then scrub with a soft, nonmetallic brush. Wash off the concrete with a garden hose fitted with a high-pressure nozzle and let it dry.
If that isn't enough, add ¼ cup of mild dishwashing detergent to a bucket of warm water and scrub again.
Failing that, use a stronger detergent for concrete stain removal, mixed with water and ¼ cup ammonia, applied with a stiff nylon brush.
For obstinate grime, mix sugar soap, which you can buy at hardware stores, in a bucket with warm water, according to the package instructions for heavy cleaning jobs. Scrub with a rigid nylon brush, then rinse with a garden hose and let air-dry.
Another approach to concrete stain removal is to hire a pressure-washing machine from a tool-hire company to squirt off dirt that's not ground into the concrete. The pressure should be set at 150 bar and this will be done at the hire shop. Use a 45-degree spray nozzle.
To remove serious concrete stains, such as tire marks, grease, oil and other stubborn materials, you're going to have to get aggressive. For fresh grease stains, first sprinkle dry cement, cat litter or sand on the spot, letting it stand an hour to absorb the slippery mess. Then sweep it up with a broom and dustpan. For more irksome grease spots, use a commercial degreaser, following label instructions.
Crayon
Children love to color, but where there are crayons, there are walls with markings, carpeting with crayon stains, and they can even end up in the laundry. These methods for cleaning crayon spots can make your job of being a parent or guardian less stressful – Crayon Spot Removal Solutions
A stick of colored wax, charcoal, or chalk, used for drawing. Crayons are practically synonymous with the brand name Crayola, which is a combination of the French word craie, "chalk" and ola, from "oleaginous," meaning oily. Emerson Moser, who was Crayola's senior crayon maker for 37 years, revealed upon his retirement that he was colorblind. He molded more than 1.4 billion crayons during his career.
Children and artists alike use crayons for their art projects throughout the year; however, parents generally find themselves removing crayon stains from their children's clothing during the school year. Younger children are probably the most likely to experience the most crayon stains over the course of the year.
Depending upon the user's level of creativity, one may need to remove crayon stains from sleeves of T-shirts, sweaters, and jackets, pant legs and shoes. Walls and flooring are also common places to find crayon stains, especially in households containing particularly boisterous tots. The hours between 9am and 3pm are the most likely times to obtain this stain, though these stains aren't limited to the school day. Coloring is a favorite past time of children all over the world, and parents are often grateful for the quiet moments in the evening when youngsters busy themselves with books and crayons.
Crayon Stain Removal from Clothes & Fabrics
Solution 1:
1. Place the stained area on a pad of paper towels and spray with WD-40 lubricant. Let stand for a few minutes.
2. Turn the fabric over and spray the other side. Let it stand for 10 minutes.
3. Work undiluted dishwashing liquid into the stained area to remove the crayon and oil. Replace the paper toweling pad as necessary.
4. Wash in the hottest possible water for the fabric, along with your normal detergent and appropriate bleaching agent (depending on whether the clothes are white or colored.)
5. Wash on the longest wash cycle available, and rinse well.
Solution 2:
1. Apply a pretreating stain remover. See Commercial Stain Remover A-Z.
2. Machine wash in hot water using laundry soap and 1 cup baking soda.
3. If the crayon stain remains, launder again in the hottest water that is safe for the fabric. If the fabric can be bleached, add 1 cup bleach to a hot water wash.
Crayon Stain Removal from Carpets & Upholstery
Solution 1:
1. Sponge with a small amount of dry-cleaning solvent. Blot.
2. Mix 1 teaspoon of a neutral detergent (a mild detergent containing no alkalis or bleaches) with a cup of lukewarm water. Blot.
3. Sponge with clean water. Blot.
Solution 2:
1. If the crayon is soft, freeze it by applying an ice cube wrapped in a small plastic bag, and then scrape off the excess crayon.
2. Cover the stain with a clean white cloth and press, using the tip of a warm iron. Repeat, using a clean portion of the cloth until all the wax is transferred from the carpet to the cloth.
3. If a color stain remains, sponge the stain with a dry-cleaning solvent.
Curry
Plenty of folks have discovered how delicious curry can be, but not as many know what do to when curry stains appear on their carpet or clothing. Prompt treatment will give you the best chance of curry stain removal if you've spilled a spoonful of your delicious dinner – Curry Spot Removal Solutions
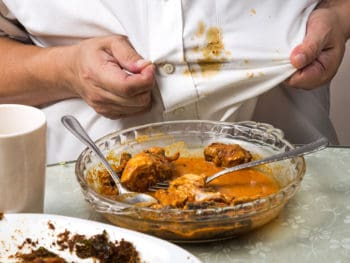
From the southern Indian word kari, meaning "sauce," comes this catch-all term that is used to refer to any number of hot, spicy, gravy-based dishes of East Indian origin. Curry powder is an integral ingredient in all curries. Curry's often contain a mix of red pepper, coriander and cumin, among a large variety of other spices. Curry can be used as a gravy or sauce or as a side dish served with rice or bread. It is most often associated with Asian and Indian cuisines, but is served around the world.
Curry Stain Removal from Clothes & Fabrics
Solution 1:
1. To remove curry stains, try soaking in warm water, changing the water if it becomes colored by the curry.
2. Squeeze out the excess water and dab on a mixture of glycerin and water (combined in equal quantities). Leave for an hour.
3. Rinse and repeat if necessary.
4. Launder, using the hottest water and type of bleach (chlorine bleach preferred) that is safe for the fabric.
Solution 2:
1. Pretreat with a prewash stain remover.
2. Launder, using chlorine bleach, if safe for the fabric, or oxygen bleach.
3. If the stain persists, soak in a solution of 1 part hydrogen peroxide to 9 parts cold water for at least 30 minutes.
4. Rinse, and then launder again to finish removing curry stains.
Curry Stain Removal from Carpets & Upholstery
Solution 1:
1. Mix 1 tablespoon of liquid hand dishwashing detergent and 1 tablespoon of white vinegar with 2 cups of warm water.
2. Using a clean white cloth, sponge the stain with the detergent/vinegar solution. Blot frequently with a dry cloth until the stain disappears.
3. Sponge with plain water; blot until the liquid is absorbed.
4. Sponge the stain with rubbing alcohol; blot to remove the stain.
5. Sponge with water; blot until the liquid is absorbed.
6. If the stain remains, mix 1 teaspoon of liquid hand dishwashing detergent and 1 tablespoon of ammonia with 2 cups of warm water.
7. Sponge the stain with the detergent/ammonia solution. Leave it on the stain for at least 30 minutes, blotting every 5 minutes with a clean white cloth and more solution.
8. Sponge with cold water and blot dry.
Solution 2:
1. Scrape off as much curry as possible, while being careful not to spread the stain further.
2. Mix a solution of 2 cups cold water, 1 tablespoon dishwashing liquid, and 1 tablespoon of white vinegar.
3. Using this solution, sponge the stain with a clean white cloth.
4. Blot at the stain until the liquid is absorbed.
5. Repeat steps 3-4 until the curry stain is removed.
6. If that completely removes the stain, use cold water and a new white cloth to sponge the area and remove the cleaning solution. Blot dry.
7. If curry stain is still there, blot with rubbing alcohol, and follow step 6.
Deodorant
This product may be designed to stop odors, but the sight of it can be less than pleasant. Whether it comes from exercise or by accident, it can ruin the appearance of many materials – Deodorant Spot Removal Solutions
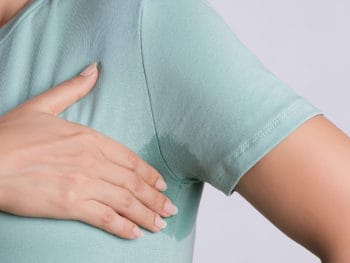
A substance applied to the skin to mask or suppress body odors. The skin of the armpits can harbor up to 516,000 bacteria per square inch, while drier areas, such as the forearm, have only about 13,000 bacteria per square inch. For this reason, in many cultures adults apply deodorants and antiperspirants to their armpits to prevent excessive sweat and odor.
Perspiration, and thus the need to remove deodorant stains, occurs all year long, but it is much more prevalent during the balmy summer months, when the use of deodorant is demanded. Stains from deodorants and antiperspirants will be found not only in the armpit areas of clothes, but also on the sides and waist areas of pull-over shirts or dresses.
Deodorant Stain Removal from Clothes & Fabrics
Solution 1:
For fresh stains –
1. Mix a laundry presoak (spot stain remover) with lukewarm water and sponge on the stain. Let stand several minutes.
2. Rinse well.
3. Repeat steps 1 and 2 until no more stain can be removed.
4. If the stain damages color, restore it by sponging the damaged area with ammonia. If treating wool or silk for a stain, dilute ammonia with an equal amount of water.
5. Rinse well.
6. Launder in the hottest water safe for the fabric.
Solution 2:
For dried stains –
1. Mix a laundry presoak (spot stain remover) and lukewarm water. Place stain face-down on an absorbent cloth and sponge the back of it with the mixture. Let stand several minutes.
2. Rinse well. Repeat until no more stain can be removed.
3. Rub liquid enzyme detergent into the stain.
4. Launder in the hottest water safe for the fabric.
5. If fabric has discolored, restore by blotting with white vinegar.
6. Rinse well.
Feces
It can happen for a variety of reasons such as small children, if someone is really sick, if you have pets, or possibly you have an overflow in the bathroom. Removing stains of excrement is not pleasant but you know you are going to have to – Feces Spot Removal Solutions
Waste matter eliminated from the bowels; excrement. There's no getting around the fact that most people turn up their noses at a feces stain. Even though it comes from the body and is natural, it's just not terribly pleasant stuff. Many people are used to dodging doggy-do on the sidewalks, but that's a less common sight these days due to more stringent laws.
Since both people and animals must empty their bowels regularly, even daily, feces stains can occur any time of the year. During an accident, a person can embarrassingly stain his or her own undergarments, trousers or bed linens. When changing a baby or cleaning out the litter box, those who neglect to roll up his or her sleeves beforehand may fall victim to this particularly nasty stain. The same goes for cleaning up after Rover in the park.
Since adults do not soil themselves as a matter of course, this sort of stain knows no particular time. Early morning or late night, are the most common hours for incurring a feces stain while cleaning up after a pet or changing a baby.
Feces Stain Removal from Clothes & Fabrics
Solution 1:
1. Use a dull knife or spoon to remove as much as possible.
2. For fresh stains, soak and agitate the fabric thoroughly in cold water. For dried stains, soak fabric in a soapy mixture of cold water and liquid enzyme detergent for 30 minutes or until the stain has loosened.
3. Rinse well.
4. If the stain remains, rub a liquid enzyme detergent into the stain and let stand several minutes.
5. Launder according to garment label.
6. If the stain remains, soak in an enzyme detergent mixture and cold water mixture up to 30 minutes.
7. Rinse Well.
8. Apply a laundry presoak (spot stain remover) and launder again. On white fabrics, especially baby clothes, bleach any remaining stain by blotting with lemon juice and setting to dry in the sun.
Feces Stain Removal from Carpets & Upholstery
Solution 1:
1. Use a dull knife or spoon to remove as much as possible.
2. Blot the stain with paper towels or an old white towel to absorb any moisture.
3. Blot the spot with a terry-cloth towel dipped in white vinegar.
4. When dry, fluff up the area with your hand or a soft brush.
5. After the carpet has dried, sprinkle baking soda over the area to get rid of any lingering smell. Apply it to the area and leave it for at least 24 hours, then vacuum it up. The smell should be gone.
Solution 2:
1. Follow steps 1 and 2 from Solution 1.
2. Blot the area with club soda, then cover with a dry white towel and weight it down with some heavy books so the towel can absorb the moisture from the rug. If the towel becomes damp, replace it with a dry one.
3. Follow step 5 from Solution 1.
Furniture
Consider that dining room table you bought a few years ago. Wouldn't it be nice if, years down the road, your grandchildren prized it as an antique? Follow these furniture stain removal tips for common spots – Furniture Spot Removal Solutions

Ballpoint Ink
1. For furniture stain removal, apply a small amount of rubbing alcohol to the stain.
2. Remove after 5 minutes by wiping.
3. Repeat if needed.
4. If rubbing alcohol does not remove the spot, then try white (non-gel) shaving cream foam.
5. Condition with a high-quality furniture wax.
Beer and Alcohol
1. Stains of this nature will darken and possibly warp the wood.
2. Clean with a solution of ¼ cup white vinegar per quart of water.
3. Dry, then wait several days to see if the wood will be darkened.
4. It may be necessary to sand and refinish the furniture.
5. If the wood has not darkened, apply a high-quality wood conditioner.
Berry Stains
1. For furniture stain removal, use 3% hydrogen peroxide, but go easy because it can bleach the wood.
2. Apply, wait 5 to 10 minutes, and blot with ¼ cup white vinegar per quart of water.
3. If the wood bleaches, use the meat of a walnut or pecan to restore the color.
4. Treat with wood conditioner.
Candle Wax
1. Use ice directly on the wax to get it as cold as possible and immediately wipe up excess water.
2. Once the wax is very cold, try carefully inserting a butter knife under the wax to see whether it will pop off.
3. If this method doesn't work, don't attempt anything else. Consult a professional.
Coffee or Cola
1. Wipe immediately.
2. If water spots remain from larger stains, use a good wood cleaner and conditioner made to remove water spots from furniture.
Glue and Adhesive
1. For furniture stain removal, freeze the glue with an ice cube placed in a zip-lock bag.
2. Scrape off what you can with a plastic scraper.
3. Apply a small amount of smooth peanut butter, wait 5 minutes, and gently blot. The oil from peanut butter should dissolve any remaining glue.
Grease (Auto) and Motor Oil
1. Rubbing alcohol will remove grease and oil from sealed furniture.
2. Apply, wait no longer than 5 minutes, and remove with a soft cloth.
3. Repeat if needed.
4. For tung oil finishes, pour on enough cornstarch to thoroughly cover the stain, gently pressing it into the wood.
5. Wait 30 to 60 minutes and vacuum off the cornstarch.
6. Keep applying until no more oil is absorbed.
7. Then dab on just a bit of rubbing alcohol with a cotton swab and follow step 2.
8. Apply furniture wax to all furniture surfaces to restore the wood's luster.
Gum
1. Apply real mayonnaise to soften the remaining gum.
2. Use a solution of ¼ cup white vinegar per quart of water for furniture stain removal.
3. Follow with a high-quality wax for wood furniture.
Nail Polish
1. If the spilled polish is still wet, blot clean and wipe any remaining residue with mineral spirits. Avoid nail polish remover – it contains solvents that can dissolve the furniture finish.
2. If the stain is dry, soak the stain for no longer than 5 minutes with boiled linseed oil, and then scrape off the reside with a nonstick spatula.
3. Repeat the process as needed.
4. Treat the wood after it dries with a wood conditioner to prevent drying and cracking of the wood.
Paint
1. If you have a fresh paint stain on your furniture, remove latex paint with water; remove alkyd (oil-based) paint with mineral spirits.
2. To remove a dry stain, saturate the spot in boiled linseed oil.
3. After the pain softens, lift it off carefully with a putty knife. Alternatively, wipe with a cloth dampened in the boiled linseed oil.
4. Remove residue by making a paste of boiled linseed oil and rottenstone, a polishing powder sold where you buy refinishing supplies.5. Rub the paste along the grain, and then wipe it dry ad wax or polish it.
Rust
1. For furniture stain removal, squeeze enough juice from a fresh lemon to thoroughly saturate the spot. Do not allow it to set for long or it will warp the wood. Blot.
2. If that begins to dissolve the rust, wait 24 to 48 hours for the wood to dry and repeat.
3. If the rust is stubborn, boil linseed oil, lightly apply to the wood, wait 5 to 10 minutes, and blot.
4. The wood may need to be sanded with a 0000 steel-wool pad.
5. Apply a wood conditioner or refinish if needed.
Shoe Polish
Note: It may be impossible to completely remove the polish because it works into the grain of the wood.
1. Try blotting the polish with rubbing alcohol.
2. Wait 15 minutes and blot to remove.
3. Alcohol removes some shoe polishes but not all of them.
4. If that does not bring the desired results, apply a bit of turpentine.
5. If the polish remains, it has soaked into the grain and the wood must be sanded and refinished.
Wine
1. Blot immediately until no more moisture has soaked into the towel.
2. For furniture stain removal, press cornstarch on the stain to absorb as much wine as possible.
3. Remove and repeat until the moisture is gone.
4. Wait until the wood has dried, and then apply peroxide. It may be possible to apply a wood stain or use the meat of a walnut or pecan to restore the color.
5. Sanding and refinishing the surface may be necessary.
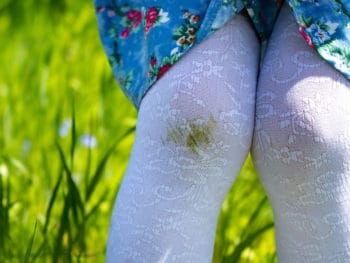
Grass
If your children love to play outside, there's a good chance you've had to contend with grass stains. Green and unsightly, grass stain removal can be difficult if you don't act quickly – Grass Spot Removal Solutions
Any of a large family of monocotyledonous mostly herbaceous plants with jointed stems, slender sheathing leaves, and flowers. Nearly unavoidable during times of moderate weather, this plant is frequently the object of obsession for many men and women. Grass grows quickly when watered, hence, many people regularly trim it to a comfortable height of, on average, about 3 inches.
The need to remove grass stains appears during periods of moderate weather when you are likely to be spending time outdoors – spring, summer and fall are the seasons when you are most likely to roll down hills, sit in the park, or go camping. The most obvious spots for removing grass stains are from the seats and knees of pants, the seats of skirts and shorts, and the elbows of jackets and long-sleeved shirts.
Grass Stain Removal from Clothes & Fabrics
Solution 1:
1. Washing in a biological detergent should remove most grass stains.
2. If badly stained, soak in a solution of ordinary washing soda (55g) and warm water (2.5L), then rinse.
3. Or, dab with methylated spirits before washing.
Solution 2:
1. Brush white non-gel toothpaste into the stain using an old, soft toothbrush.
2. Rinse and launder.
Grass Stain Removal from Carpets & Upholstery
Solution 1:
1. Using a clean white cloth, sponge the stain with acetone.
2. Sponge the stain with a dry-cleaning solvent.
3. Blot until the solvent is absorbed.
4. If the stain remains, mix 1 tablespoon of liquid handwashing detergent with 2 cups of warm water.
5. Sponge the stain with the detergent solution.
6. Blot until the liquid is absorbed.
7. Mix 1 tablespoon of ammonia with 2 cups of warm water.
8. Sponge the stain with the ammonia solution.
9. Blot until the liquid is absorbed.
10. Sponge with cold water and blot dry.
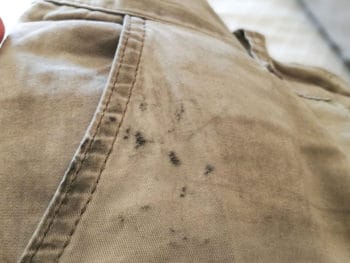
Grease
They come in all shapes and sizes and from a variety of sources. Whether your stain is from cooking oil or automotive grease, stain removal can be achieved in several ways to have your carpets and clothing looking as good as new – Grease Spot Removal Solutions
A thick oil or viscous substance. Grease is likely to be used as a lubricant in cars and other mechanical devices. Grease stains can present themselves at any time, especially if you are mechanically inclined, work around lots of moving parts, or have the nickname "grease monkey."
People who do not work around grease are not immune from having to remove grease stains. The edges of car doors are notorious for preying on the clothing of an unsuspecting victim, especially in the arm or buttocks region. Bicycle riders should also be aware of grease from the chain, or they may find themselves removing grease stains from socks and pants cuffs.
Grease Stain Removal from Clothes & Fabrics
Solution 1:
1. Light stains can be pre-treated with a spray stain remover, liquid laundry detergent, or a detergent booster.
2. Launder in hottest water safe for fabric.
3. Place heavy stains face done on clean paper towels.
4. Apply cleaning fluid to the back of stain.
5. Replace towels frequently.
6. Let air dry; rinse.
7. Launder in hottest water safe for that fabric.
Solution 2:
1. Pour boiling water through the grease spot, then dust liberally with bicarb soda.
2. Work the bicarb soda into the stain, then wash normally.
Grease Stain Removal from Carpets & Upholstery
Solution 1:
1. Sponge sparingly with dry cleaning solvent.
2. Followed by mild detergent (1 teaspoon neutral detergent – that is, no alkalis or bleaches – in 1 cup lukewarm water).
3. Finally, sponge with clean water.
Solution 2:
1. Brush dry bicarb soda or corn flour into the grease spot using an old toothbrush.
2. Leave overnight.
3. Vacuum or brush clean the following morning.
Gum
It's fun chewing on gum, but gum stains can really burst your bubble. When you get into sticky situations with chewing gum, use these stain removal tips to get you out of them – Gum Spot Removal Solutions
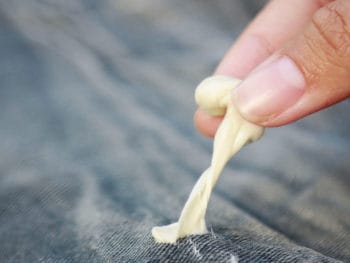
A sweetened flavored preparation for chewing, usually made of chicle. The popularity of chewing gum spread during World War II, when U.S. military personal shared and traded gum with people in Europe, Asia, and Africa. It's traditional pink color is credited to chance – the inventor had only pink coloring left, and the color has "stuck" through the years.
Gum's sticky nature doesn't affect only fabric – many people encounter the disastrous problem of removing chewing gum from hair. The most reliable method – aside from using scissors – involves peanut butter. Massage a small amount of peanut butter – preferably smooth, though chunky will work – into the gum until it is loose enough to remove. Then you must battle the peanut butter in your hair.
The need to remove gum stains from clothes, carpets, and furniture does not adhere to any season. However, there is an increased chance of encountering the substance during the school year, when children are likely to try and hide gum from strict teachers and principals. Another time when the incidence of this stain may be higher is in January, when New Year's resolutions are in place and smokers are desperate to kick the habit.
Strings of gum might stick anywhere. But removing gum stains from shoes, the seats of pants, chairs, and other upholstered furniture is most common. No parts of pants, fronts of shirts, dresses and school uniforms are safe. Gum can also be found on bed sheets and pillow cases if you fall asleep with gum in your mouth.
Chewing Gum Stain Removal from Clothes & Fabrics
Solution 1:
1. Put the garment in a plastic bag in the freezer.
2. When frozen, scrape off the hard gum with a dull knife.
3. You can also soak the garment in white vinegar, or rub the gum with egg white before washing.
Solution 2:
1. Hold the gummed area over a steaming kettle (watch your fingers) until the gum softens enough to pull off carefully.
2. Remove any remaining gum with a little white spirit on a clean cloth.
Chewing Gum Stain Removal from Carpets & Upholstery
Solution 1:
1. Sponge with a small amount of dry-cleaning solvent.
2. Then sponge with mild detergent (1 teaspoon neutral detergent – that is, no alkalis or bleaches – in 1 cup lukewarm water).
Solution 2:
1. Sponge with eucalyptus oil, then use a knife to peel away the gum.
2. Or, place some ice in a cloth and leave it resting against the chewing gum until the gum is quite hard.
3. Scrape the gum away using a knife and finish off the job with a little eucalyptus oil.
Hair Dye
If you didn't listen to me when I told you to dye your hair naked in the backyard, then hair-dye spots may be a major problem for you. Although hair dye stains can be a formidable mess to clean, it can be done by acting quickly – Hair Dye Spot Removal Solutions
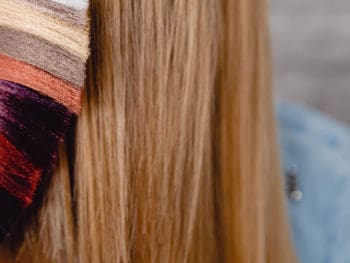
Hair dye is a permanent pigment used to change the color of your hair. If you've dyed your hair, it's possible some of the hair dye may have ended up on your clothes or carpet. As is the case with many other dyes and pigments, it can be difficult to remove hair dye stains if they are not treated right away. Once dry, removing hair dye stains becomes more challenging.
A hair dye stain is most often found on clothes, bathroom floors and bathroom surfaces and occurs during hair dye application.
Tip: To avoid the mission of removing hair dye stains, cover counter tops and floors with old towels, sheets or newspaper to avoid staining these surfaces. Wear old clothes during the dyeing process. If you must walk around or leave the house during the dyeing process, wrap plastic cling wrap over your hair to prevent the dye from dripping and causing stains.
Hair Dye Stain Removal from Clothes & Fabrics
Solution 1:
1. Clothing or fabrics stained with hair dye should be washed in warm water, to which you have added white vinegar, and your normal detergent.
2. Do this in a sink or container, adding about 2 tablespoons of detergent and 2 cups of white vinegar to a gallon of warm water.
3. Let it soak for several hours.
Solution 2:
1. Mix ingredients of 1/2 teaspoon dishwashing detergent, 1 tablespoon ammonia, and about 1 quart of warm water.
2. Soak the spot on the garment or the whole article of clothing itself in the solution for about a half minute.
3. Rinse the article of clothing in water immediately after the solution has been applied.
4. Rub the spot lightly with a brush once the rinsing is complete. You should also blot the spot on the clothing with rubbing alcohol.
5. Rinse the article of clothing once again in water.
6. Place your clothing in the washing machine as soon as it's completely dry and clean it as normal with the rest of your clothes.
Hair Dye Stain Removal from Carpets & Upholstery
Solution 1:
1. Add and stir 1 tablespoon of white vinegar and 1 tablespoon of dishwashing liquid with two cups of clean water.
2. Blot the stain with the solution. Dip a clean dry sponge into the solution, apply it directly to the stain and rub in a circular motion. Keep rubbing until suds form.
3. Rinse the sponge under running water, squeeze and blot the stain until the soapy residue is absorbed. Rinse again, and blot until the area is no longer soapy.
4. Pour 2 tablespoons of rubbing alcohol on the stain, and rub with a damp sponge or cloth. Keep rubbing for 5 minutes or until the stain is no longer visible. Blot with a clean dry cloth or sponge afterwards.
5. If the hair dye stain still remains or there are traces, apply an ammonia detergent solution. Mix 1 tablespoon of ammonia with 1 tablespoon dishwashing liquid with one cup of clean water.
6. Slowly pour the solution over the stain, and vigorously scrub using a clean damp sponge for 5 minutes.
7. Leave the solution on the stain for 30 minutes, blotting every five minutes with a clean sponge and more solution.
Hard Water
The term "hard water" is used to describe water that is high in certain minerals, usually calcium and magnesium. A high enough concentration of these metals in your water can cause white lime scales on surfaces which the water comes into contact with – Hard Water Spot Removal Solutions
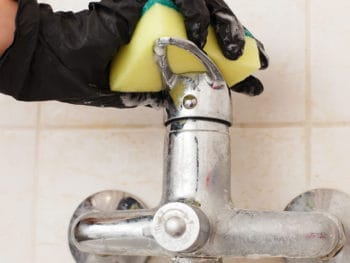
This is your guide to hard water stain removal from a complete array of surfaces in your home. If you're in a hard water area, you'll know it: surfaces that get wet frequently will have colorful stains, whitish spots or crusty deposits. The dreaded lime scale may build up enough to interfere with the function of fixtures like shower heads and taps. Soaps will seem to leave a residue and it will take more detergent to get things clean than it has in other places you've lived. The effects of hard water include dull, sticky hair; dingy, scratchy clothes; and spotted dishes.
The culprits? Minerals in your water, mostly calcium and magnesium. For you chemistry majors, moderately hard water has concentrations of at least 61 milligrams of these minerals per liter, and really hard water has double that amount.
To prevent hard water stains, keep hard water away from the surfaces that it typically damages. Hard water does its mischief by evaporating and leaving behind mineral deposits. So to beat it, keep wet surfaces from air-drying in the following ways:
- Dab taps dry.
- Keep lawn sprinklers away from windows.
- Fix leaks and drips.
- Rinse basins, baths, and shower stalls after use and then wipe or squeegee them dry.
It also helps to keep on hand a spray solution for hard water stain removal containing a non-precipitating water conditioner. Mix ½ teaspoon of water conditioner in 1 liter of water in a spray bottle and spray it on wet surfaces to capture the mineral particles along with the water as you wipe things dry.
Hard water stain removal – a number of cleaners attack hard water deposits with special chemicals. These compounds include:
Sequestrants, which capture (or sequester) minerals so they don't leave a deposit (the phosphates in automatic dishwasher detergents are sequestrants).
Surfactants (short for surface acting agents), which loosen dirt by reducing surface tension, allowing the water to wet things faster (the main ingredient in laundry detergent is a surfactant).
Acids, which help break down material deposits.
Alkalis (present in some cleaners), which help suspend dirt so it can be rinsed away.
See below to select the best type of cleaner for curing your hard water blues.
To remove hard water stains entirely, consider installing a water-softening system. These systems typically treat the water with sodium, which trades places with the calcium and magnesium particles in the water. But to properly address all of the minerals in the water – including manganese (brown-black stains) and iron (reddish-brown stains) – your water-softening system has to be customized to fit the water in your area. Such a system will make hard water stain removal a thing of the past.
Hard water deposits can collect on a bewildering array of surfaces in your home. Here are some tips on which cleaners to use where, when removing hard water stains. Read labels to make sure you've got the right product and test surfaces before doing an all-out cleanup. A word to the wise: never mix chlorine bleach with ammonia-based or acidic products.
Brass (unlacquered)
- Mildly abrasive brass cleaner such as Brasso.
Ceramic tiles
- Acid-based kitchen-bathroom cleaner. Avoid bleach.
- Nonabrasive all-purpose cleaner.
- 1 part white vinegar to 4 parts water.
Chrome
- Nonabrasive ammonia-based chrome cleaner.
- Kitchen-bathroom cleaner labeled suitable for chrome.
Fibreglass
- 1 part white vinegar to 4 parts water.
- Nonabrasive all-purpose cleaner.
Glass (windows and shower doors)
- Extra dishwasher detergent. Use up to double for tough hard-water film.
- Kitchen-bathroom cleaner formulated for mineral deposits and soap scum.
Glassware (permanent etching or iridescent discoloration is not removable)
- Undiluted white vinegar. Soak for 15 minutes, rinse, and dry.
- Dishwashing rinsing agent. Add to dishwasher.
Plastic laminate (such as Formica)
- Bicarbonate of soda. Dip cloth into bowl of warm water, then into bowl of bicarbonate of soda and rub. Wipe clean with a dry cloth.
Porcelain enamel
- Kitchen-bathroom cleaner formulated for mineral deposits and soap scum. Some toilet-bowl cleaners contain stronger acids – don't leave on surface long.
- Nonabrasive all-purpose cleaner.
- Rust remover.
Stainless steel
- Nonabrasive all-purpose cleaner.
- Spray solution of ½ teaspoon non-precipitating water conditioner per 1 liter of water.
- Try a dedicated stainless-steel cleaner. Rinse well.
Vitreous china fixtures
Lime-scale remover.
Hydrogen Peroxide
Hydrogen peroxide is commonly used as a stain remover, similar to bleach, to take out color and sanitize surfaces. Paradoxically, hydrogen peroxide can also cause stains. If this is the case, follow these stain removal tips – Hydrogen Peroxide Spot Removal Solutions
A viscous liquid with strong oxidizing properties; a powerful bleaching agent; also used in aqueous solutions as a mild disinfectant and in strong concentrations as an oxidant in rocket fuels. There's nothing better for use on a cut or scrape than hydrogen peroxide, even though it stings when applied. Hydrogen peroxide is a natural healer – it must be present in the body for the immune system to function properly. White blood cells produce it as the first line of defense against toxins, parasites, bacteria, viruses, and yeast.
Since there is no prescribed time of year for mishaps resulting in skin abrasions, there is no set season when removing hydrogen peroxide stains is more likely. The exception might be summer, when the number of cuts and scrapes may rise with the temperature, since shorts are worn and children play outside more at that time.
When treating a scrape on the knee with the stuff, the rolled up cuffs of pant legs or the hems of shorts will be most affected by this stain. When hair dye is unavailable, hydrogen peroxide works to bleach hair. In this instance, you may have to remove hydrogen peroxide stains from the collar area of whatever type of shirt is worn during the dyeing process.
Hydrogen Peroxide Stain Removal from Clothes & Fabrics
Solution 1:
1. Rinse the back of the stain thoroughly as soon as possible with cold water to neutralize the acid.
2. Place the garment on an absorbent cloth and sponge well with ammonia, starting from the outside of the stain's edge. Replace cloth underneath as it becomes saturated. (If treating stains on wool or silk, dilute ammonia with an equal amount of cold water.) If ammonia is not available, substitute a baking soda paste, mixing baking soda and water at a ratio of approximately 3 to 1. Rub into stain.
3. Rinse well.
4. Repeat as needed.
5. Launder according to garment label.
Hydrogen Peroxide Stain Removal from Carpets & Upholstery
Solution 1:
1. Sponge the stain immediately with cold water to remove as much acid as possible.
2. Mix baking soda and water to make a paste at a ratio of approximately 3 to 1 and scrub into stain with an old toothbrush, then let dry.
3. Repeat steps 1 and 2 until you have removed as much stain as possible.
4. Vacuum.
Ink (Ballpoint, Permanent, Water-Based)
Have you been the victim of an ink stain? Try not to explode along with your pen. The written word may live on forever, but an ink stain doesn't have to be permanent – Ink Spot Removal Solutions
Ballpoint Pen Stains
This is your step by step guide to ballpoint pen ink stain removal from clothes, fabrics, carpets and upholstery. Ballpoint pen ink is not something that you can usually remove with simple soap and water, but there is an easy and inexpensive way to remove ballpoint pen ink.
Below are solutions on how to remove ink stains cause by ballpoint pens from clothes & fabrics and removing ink stains from carpets & upholstery.
A pen in which the point is a fine ball bearing that rotates against a supply of semisolid ink in a cartridge. To most of the world, Biro is still the generic name for the ballpoint pen. Most people need to write every day, all year long, thus a stain incurred from the ink in ballpoints may appear anywhere, any day of the year.
The knees of jeans seem to be popular spots for a line of blue ink. Another spot ink stains are generally found is on or around the breast pockets of dress shirts or suit jackets, due to the fondness of ballpoints to leak or break in the pocket. Ink spots may also be found on desks, tables, and walls.
Ballpoint Pen Ink Stain Removal from Clothes & Fabrics
Solution 1:
1. Stain should be placed face down on white paper towels.
2. Sponge with rubbing or denatured alcohol or dry-cleaning solvent, or rub detergent into stained area.
3. Repeat if some stain remains.
4. Rinse; launder.
Solution 2:
1. Soak one pad of cotton wool in methylated spirits.
2. With the methylated spirits pad under the stain and a clean cotton wool pad on top, dab the stain.
3. When some of the stain has transferred to the top pad, turn it over so it's clean side is in contact with the fabric and repeat.
4. Change the top pad and continue working until no stain comes through.
5. Wash as usual.
Ballpoint Pen Ink Stain Removal from Carpets & Upholstery
Solution 1:
1. Sponge with a dry cloth and methylated spirits, or a small amount of dry-cleaning solvent.
2. Next, sponge with mild detergent (1 teaspoon neutral detergent – that is, no alkalis or bleaches – in 1 cup lukewarm water).
3. Finally, sponge with clean water.
Solution 2:
1. Spray hair spray onto the ballpoint pen stain to soften the ink.
2. Blot the wet hair spray with a white cloth or paper towel.
3. Repeat until stain disappears and allow carpet to dry.
4. Once dry, hand brush the area gently and vacuum any dried hair spray.
Permanent Marker Stains
This is your step by step guide to permanent marker stain removal from clothes, fabrics, carpets and upholstery. As the name indicates, permanent markers are permanent – so they may not be able to be removed completely. You can lighten the stain significantly though, and may be able to lighten it enough that it will be hardly noticeable. Below are solutions on how to remove ink stains caused by permanent marker from clothes & fabrics, removing ink stains from carpets & upholstery, and removing ink stains from hard surfaces.
A type of marker pen that is used to create permanent writing on an object. Getting rid of ink stains from a permanent marker is no easy task – the substance's very existence depends upon its tenacity. Shirts, especially sleeves and cuffs, as well as pants are prime targets for this difficult stain.
Tip: This ink spot needs immediate treatment. Check with the ink manufacturer to see if a particular solvent is recommended; use this before employing the stain removal steps that follow.
Permanent Marker Ink Stain Removal from Clothes & Fabrics
1. Try pouring water through the stain before it dries, until pigments are removed.
2. Allow to dry.
3. If you notice some reduction in stain, sponge with dry-cleaning solvent.
4. Allow to dry.
5. Rub liquid household cleaner into stain.
6. Rinse.
7. Soak stain (possible overnight) in warm water to which 1 to 4 tablespoons of household ammonia have been added.
8. Rinse and repeat treatment if necessary; launder.
Permanent Marker Ink Stain Removal from Carpets & Upholstery
1. Moisten the stain lightly with rubbing alcohol or hairspray and lightly blot with a white towel.
2. You should see the marker marks being transferred to the towel.
3. Repeat to remove as much of the marker stain as possible.
4. Once the stain is gone, moisten the area with water and then blot with a clean, dry towel until the carpeting is dry.
Permanent Marker Ink Stain Removal from a Hard Surface (such as wood, paneling, or tile)
1. Dampen a cloth with nail polish remover or rubbing alcohol and wipe stain.
2. Rinse surface with water.
3. Repeat steps 1 and 2 as needed.
Felt Tip Pen / Magic Marker Stains
This is your step by step guide to magic marker ink stain removal from clothes, fabrics, carpets and upholstery. Finding a magic marker stain is disheartening. Whether your kids drew on your furniture upholstery or a magic marker leaked in the pocket of your favorite pants, it is important to treat these stains promptly. Below are solutions on how to remove ink stains caused by magic marker from clothes & fabrics, removing ink stains from carpets & upholstery, and removing ink stains from hard surfaces.
Description: Water-based ink is a fluid used for writing or printing that is made from a base of water with tint added. Getting rid of stains from water-based ink is much easier than other types of ink. It is often used in marking pens, and comes in a variety of colors.
The most common place you see water-based ink stains is on the fingers and hands of someone who has recently completed a drawing or created a home-made birthday card. This substance will likely find its way from the hands onto clothing. Other places this stain is likely to appear include tabletops, desks, chairs, walls and tile flooring.
Magic Marker Ink Stain Removal from Clothes & Fabrics
1. Use hard soap to lubricate the stain.
2. Wash as normal.
3. For obstinate stains use methylated spirits and the absorbent pad method as follows.
4. Soak one pad of cotton wool in methylated spirits.
5. With the methylated spirits pad under the stain and a clean cotton wool pad on top, dab the stain.
6. When some of the stain has transferred to the top pad, turn it over so its clean side is in contact with the fabric and repeat.
7. Change the top pad and continue working until no stain comes through.
8. Wash again to remove final traces.
Magic Marker Ink Stain Removal from Carpets & Upholstery
1. Sponge sparingly with dry-cleaning solvent.
2. Sponge with mild detergent (1 teaspoon neutral detergent – that is, no alkalis or bleaches – in 1 cup lukewarm water).
3. Finally, sponge with clean water.
Magic Marker Ink Stain Removal from a Hard Surface (such as wood, paneling, or tile)
1. Wipe with damp cloth or sponge.
2. If the stain remains, wipe with rubbing alcohol or nail polish remover.
3. Rinse surface with water.
Iodine
Iodine can come in handy when cleaning up a wound, but when it gets on your clothes or carpet it can be a real pain – Iodine Spot Removal Solutions
A liquid containing iodine, a grayish-black, corrosive, poisonous element, dissolved in ethyl alcohol, used as an antiseptic for wounds. Iodine gets its name from the Greek word Iôdes, meaning "violet," since it gives off a violet vapor when heated. Iodine itself is a poisonous gas, as are the related halogens chlorine, fluorine, and bromine. However, as with chlorine, the salts are negatively charged ions of iodine (iodides). It is this not-so-disruptive form of iodine that is used to clean cuts and wounds.
Summertime is the popular season for removing iodine stains. You are most likely to encounter scrapes, cuts, and scratches during this active time of year, when working or playing outdoors. Of course, the less graceful among us can encounter such scrapes and cuts regardless of the season, and there are few who can escape a paper cut during the dry winter months. The need to remove iodine stains transcends season in these instances – it is a stain-maker for all seasons.
Iodine stains aren't just found on the lab coats on chemists. Stains can sneak out from underneath bandages on any part of the body, but most likely on knees, elbows, and other scrape-prone areas, to stain shorts and T-shirts. Bedsheets are at particular risk for iodine stains because, in the quest to let a wound breathe, you may not bandage a wound that has been covered in iodine, leading to the morning surprise of stained bed linens.
Iodine Stain Removal from Clothes & Fabrics
Solution 1:
1. For washables, apply a liquid laundry detergent containing enzymes (or a paste made from a granular detergent and water) directly on the stain.
2. Lay the garment on a hard surface and pat the stain lightly with the back of a spoon to force the solution into the fibers. Avoid rubbing the material together which abrades the fibers.
3. Wash as directed with the hottest water safe for the fabric.
4. If that does not work, rinse and follow the same patting procedure but with a solution of 2 tablespoons ammonia per 1 cup water.
5. If that fails to remove the stain, rinse and try a vinegar solution – 1 cup white vinegar per 2 cups water.
6. For fabrics that cannot be washed, either have them professionally dry-cleaned or blot them with a white towel and a spot remover.
7. Blot from the inside of the garment to push the stain out. When using these products, wear protective rubber or latex gloves and use them in a well-ventilated area.
Solution 2:
1. Rinse from back side of stain under cool, running water.
2. Soak in solution of color remover, or sponge with a solution of sodium thiosulfate crystals (available at a drug store).
3. Rinse and launder.
Iodine Stain Removal from Carpets & Upholstery
Solution 1:
1. First, try a spot remover. Never pour the spot remover directly on the stain. Instead, put it on a clean white towel and blot the stain repeatedly.
2. If that doesn't work, blot with a solution of ¼ teaspoon liquid dishwashing detergent and 1 cup lukewarm water.
3. Rinse by blotting with a clean white towel moistened with water, then dry with a fresh towel.
Solution 2:
1. Sponge with mild detergent (1 teaspoon neutral detergent – that is, no alkalis or bleaches – in 1 cup lukewarm water).
2. Sponge with vinegar solution (1/3 cup white vinegar in 2/3 cup water).
3. Sponge with ammonia solution (1 tablespoon household ammonia in ½ cup water).
4. Repeat step 1 and, finally, sponge with cool water.
Ketchup
Ketchup is one of the world's favorite condiments: we drizzle it on hamburgers and hot dogs, and drown french fries, hash browns, and eggs in the stuff. With all the ketchup that's consumed, we should know the proper way to remove those unsightly red blotches – Ketchup Spot Removal Solutions

A condiment consisting of a thick, smooth-textured, spicy sauce usually made from tomatoes. Though the ingredients of ketchup don't usually differ from nation to nation, the primary uses for it do, for example, in Sweden, on pasta; Eastern Europe, on pizza; Japan, on rice; Denmark, on spaghetti; Thailand, as dip for potato chips; Great Britain, on fish and chips; Spain and India, on eggs; and in the United States, on hamburgers, hot dogs, and french fries.
While ketchup is unarguably the most popular condiment at a summer cookout, this won't be the only time and place you'll find the need to remove ketchup stains, since hamburgers and french fries are year-round foods. A ketchup spot could appear literally any time and consequently, you'll find yourself removing ketchup stains any time.
This is a foodstuff with a tendency to plop and splatter. From the collar of your windbreaker after eating a hot dog at the game, to the hem of your dress after the church picnic, ketchup is found to be an equal opportunity stain.
Ketchup Stain Removal from Clothes & Fabrics
Solution 1:
1. Scrape away any excess ketchup.
2. For washables, first soak the stained item in cold water to remove as much of the ketchup as possible. The older the stain, the longer you should soak it – up to several hours.
3. Then pretreat it before washing it. Begin by mixing a ¼ teaspoon clear liquid dishwashing detergent with ½ cup cold water.
4. Apply it directly to the fabric, and then lay the garment on a hard surface and pat the stain lightly with the back of a spoon. This allows the solution to get in between the fibers, where stains hide. Don't rub the fabric together; that will abrade the fibers.
5. Next, wash as directed either by machine or by hand in the hottest water safe for the fabric.
6. If the stain does not come out completely, follow the same pretreatment procedures but, this time, with a solution of 1 teaspoon ammonia and ½ cup cold water. Again, wash as directed.
7. If that fails, try a liquid laundry detergent containing enzymes (or a paste made from a granular detergent and water). Apply it directly on the stain, pat, and then wash.
8. For fabrics that cannot be washed, either have them professionally dry-cleaned or blot with a clean white towel and a spot remover. For ketchup stain removal, blot from the inside of the garment to push the stain out.
Solution 2:
1. Use a dull knife or spoon to remove as much as possible.
2. Flush the back of the stain immediately with cold water to force the stain through the fabric.
3. Rub a liquid enzyme detergent into the stain and let stand several minutes. Rub the fabric between thumbs during soaking.
4. Rinse well.
5. Sponge with a mild bleach, such as white vinegar, hydrogen peroxide, or lemon juice, then rinse well.
6. Repeat steps 3 through 5 until no more stain can be removed.
7. Apply a laundry presoak (spot stain remover) and let stand several minutes.
8. Launder with an enzyme detergent.
9. Let garment dry in the sun for added bleaching.
10. If the stain remains, rub an enzyme detergent into the stain and then soak garment in warm water for up to 30 minutes or until the stain is removed. Rinse well.
11. Apply laundry presoak (spot stain remover) and relaunder.
Ketchup Stain Removal from Carpets & Upholstery
Solution 1:
1. Blot with a clean white towel and water.
2. Mix ¼ teaspoon clear liquid dishwashing detergent with ½ cup cold water. Dip a white towel in the solution and blot.
3. Rinse by blotting with a clean towel and water.
4. If the stain does not come out completely, follow the same procedure but, this time, with a solution of 1 teaspoon ammonia and ½ cup cold water.
5. If stain remains, as a last-ditch effort, try blotting with hydrogen peroxide. But be careful: It will cause color dyes to bleed and fade.
Leather
Leather means any skin or hide that has been tanned, but after that the similarities end and the differences begin. The two main categories of leather, natural and coated, require different cleaning techniques – Leather Spot Removal Solutions
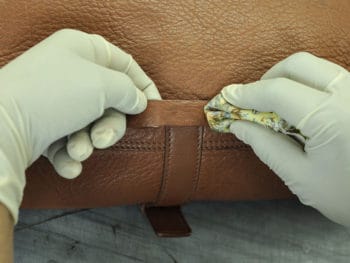
Natural leather has little surface protection and is highly susceptible to staining. It is not dyed with pigments, has no finish coat of polyurethane and is recognizable by its rustic, natural, appearance. Even water or treatments suitable for other kinds of leather, such as saddle soap, may mar its surface when cleaning leather stains.
Coated leather has a pigment-dyed surface treated with a polyurethane coating. Most – but not all – leather garments, upholstery, bags and shoes are coated leather.
A few guidelines apply to both kinds:
- If you have directions on how to remove leather stains from the manufacturer, follow them.
- Test any cleaning method on an inconspicuous area before using it generally.
- For any valuable leather article or serious cleaning problem, consult a professional, such as a dry cleaner who specializes in cleaning leather stains. Shops which sell leather goods may be able to guide you.
- Avoid harsh cleaners and even excessive water, which can leave stains and remove dye and lubricants.
- Never dry wet leather near a heat source.
To clean natural leather, rely on frequent dusting with a soft cloth. You could try removing dirt with an art gum eraser, available at stationary and art supply stores, but even that might leave a smudge. There is little more you can do without making a problem worse.
To clean coated leathers, dust regularly with a cloth, occasionally with a dampened cloth. Wash every 6 months or so with saddle soap, which is available at tack shops, sporting goods stores, some shoe stores and hardware stores. Here's how:
1. Remove loose dirt with a stiff brush or damp cloth.
2. Rub a damp cloth on saddle soap and work up a lather.
3. Rub the soapy cloth on the leather using a circular motion. Wipe away the excess with another damp cloth. Let air-dry.
4. Buff with a clean, soft cloth.
5. Finish with a protective leather cream recommended by the manufacturer or a general-purpose one sold by leather retailers and supermarkets.
For leather stain removal on coated leathers, try these methods – but don't forget to test first:
- Apply cornflour to greasy spots and let it absorb the grease. Wipe off with a cloth.
- Rub with a cotton wool bud dipped in isopropyl alcohol.
- Make a paste of equal parts lemon juice and cream of tartar, work it into the spot (including scuff marks) with a cloth, let it stand for an hour or so, and wipe clean.
- Been walking on the beach? Treat those ugly, white, leather stains on shoes and boots caused by salt with a 50-50 mixture of water and white vinegar. Dip a cloth into the solution and blot.
- On mildew, use a 50-50 solution of isopropyl alcohol and water on a cloth. Saddle soap also may work.
Lipstick
You obviously want to keep that beautiful red color on your lips and not on your clothes or carpet, but that's hard to do sometimes. You may not notice the stain or you may not have time to deal with it. But the sooner you confront that smudge, the better – Lipstick Spot Removal Solutions
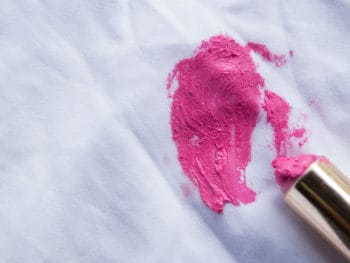
A small stick of waxy lip coloring enclosed in a cylindrical case. Thought to be a beauty enhancer, lipstick is worn by many women around the world. Made from wax, oil, pearl essence (the silvery substance in the skin of herring and other fishes), dyes and fragrances, lipstick has evolved as an essential part of modern war paint.
This substance knows no season; beauty conscious women and cross-dressers alike are never seen in public without it. Lipstick spots can appear almost anywhere. Your own lipstick is likely to show itself on the sleeves of your blouse or jacket, especially if no napkins are handy at dinner. The lipstick from another may appear on your collar, front of a dress shirt, or on a necktie.
Lipstick Stain Removal from Clothes & Fabrics
Solution 1:
1. Remove lipstick stains by rubbing vegetable oil or mineral oil into the stain, and let it sit on the spot for 15 to 30 minutes.
2. Sponge the area with a little ammonia – sudsy or clear is fine.
3. Work in undiluted liquid dish soap to be sure you have removed all of the oil.
4. Launder.
Solution 2:
1. Soak light stains then wash in the usual way.
2. Soak one pad of cotton wool or similar in proprietary grease solvent.
3. With the solvent pad under the stain and a clean pad on top, dab the stain.
4. When some of the stain has transferred to the top pad, turn it over so it's clean side is in contact with the fabric and repeat.
5. Change the top pad and continue working until no stain comes through.
6. Wash as usual.
Lipstick Stain Removal from Carpets & Upholstery
Solution 1:
1. Blot the stain with some nail polish remover.
2. Rinse thoroughly.
3. Blot the stain with a commercial spot remover.
4. Rinse thoroughly.
5. If the stain persists, try blotting it with a mixture of 2 tablespoons household ammonia per cup of water.
6. Rinse thoroughly.
7. If stain persists, try a solution of 1 cup white vinegar to 2 cups water.
8. Rinse thoroughly with warm water.
Solution 2:
1. Work shaving cream into the stain well.
2. Rinse with either cold water or club soda.
Solution 3:
1. Moisten stain with eucalyptus oil but do not rub.
2. Dab the spot with absorbent material.
3. Repeat until stain disappears.
Marble
Here's a stone-cold fact to keep in mind when cleaning marble: although marble is a heavy stone that may seem indestructible, it is actually porous and far more impervious to harsh treatment – Marble Spot Removal Solutions
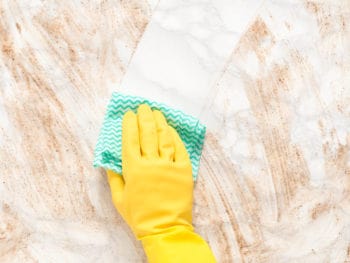
In general, clean marble with a gentle liquid soap that does not have a grease remover. The safest course is to take it easy. Mix about 2 tablespoons of mild liquid soap in 1.75 liters of water. Using a soft sponge, or a sponge mop if you're cleaning a marble floor, wipe the marble clean. Follow with two to three water rinses, depending on how soapy the water mixture is. Then dry with a soft cloth.
Clean marble floors regularly, before dirt and grit have a chance to scratch the surface. Wipe up spills immediately. As with a wood surface, avoid putting beverage glasses directly on marble, which can cause water rings. Water should bead on the marble. If the marble appears to be absorbing liquid, it's not sealed properly.
Reseal your marble floor annually a least – it's as easy as waxing a floor. Buy a stone sealer in a home improvement store. Take a sponge, sponge mop or rag and cover the entire marble surface, including corners and the backsplash. There's no need to strip the floor before you seal.
Watch out: Never use lemon, vinegar or any other acidic ingredient on marble. Acids will eat through the protective finish and damage the stone. Avoid ammonia as well. Abrasive cleaners should not be used either, since the grit can scratch and dull the marble finish.
For marble stain removal on surface spots, use a marble polishing powder, such as tin oxide, which is available from marble dealers. Follow the product's directions to the letter. If the marble item you're cleaning is stained but not of great value, you can try cleaning marble stains with a thick paste made of bicarbonate of soda and water. Apply the paste to the stain. Cover the paste with a sheet of plastic to keep the paste damp and let it stand for 10 to 15 minutes before wiping it off. Rinse with warm water and dry. If the first application doesn't fully clean marble stains, repeat the procedure. If stains still remain, it's time to call a professional marble restorer.
Mattress
If you never give a thought to cleaning your mattress, here's a wake-up call: dust mites are almost certainly feasting on dander in your neglected bed and mold spores may also be multiplying – Mattress Spot Removal Solutions

If you never give a thought to cleaning your mattress, here's a wake-up call: dust mites are almost certainly feasting on dander in your neglected bed and mold spores may also be multiplying.
Dust mites, tiny organisms that feed on the microscopic flakes of dead skin we all shed, can cause allergic reactions in some people, particularly those with asthma. Washing your sheets with hot water and occasionally vacuuming the mattress will help keep mites under control.
Periodic care and cleaning of a mattress will prolong its life even if you don't have allergies. Here's how:
Every six months rotate your mattress end to end and vacuum the exposed surface. Run the brush attachment over the entire mattress, including the sides. This will remove not only dust mites, but also mold spores. Empty the vacuum cleaner bag outdoors after cleaning or, if the bag is disposable, throw it away.
Once a year, flip the mattress over and vacuum it again. Remove the mattress and vacuum the box springs with the brush attachment as well. If you have the type of box springs with exposed springs, use a bottle brush to reach in there and lift dust away.
Accidents will happen. If bed-wetting is a problem in your house, invest in a waterproof mattress cover. But don't totally enclose your mattress in plastic. It needs to breathe. Get a cover with cloth sides and an open bottom. Urine smells and stains are difficult to remove from a mattress. Sprinkle dry borax on the wet spot. Rub it in, let it dry and vacuum.
Mattress stain removal can be tricky, because moisture is a mattress's enemy. Clean with upholstery shampoo, following the package directions. Or clean mattress stains by lifting the spot out using dry foam, which is made by whipping a grease-cutting dishwashing liquid or clothes detergent in water. Keep mixing until you have lots of soapy foam.
Using a clean cloth, soft brush or sponge dampened with warm water, apply the foam in a circular motion to the stain. Then draw out the moisture with a clean, dry towel. Repeat the procedure if necessary, then wipe the area with a clean cloth dampened with clear water. Again, press a dry towel against the spot to draw out the moisture. The key to cleaning mattress stains is to leave as little water on the mattress as possible, because moisture in the mattress filling can lead to mold growth.
To speed drying, blow an electric fan towards the mattress, or haul the mattress outside and let the sun do the job. If you've cleaned the entire mattress (one small section at a time), you may want to use a dehumidifier in the bedroom to draw out even more moisture.
Mildew
It's a fact of life, however you don't have to suffer unsightly mildew stains any longer. Mildew stains can pop up just about anywhere, so use these stain removal techniques to stop mold in its tracks – Mildew Spot Removal Solutions
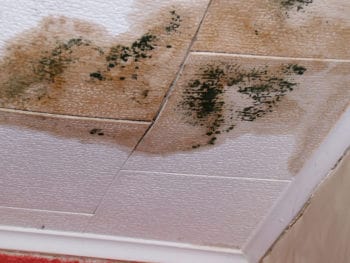
A superficial coating or discoloration of organic materials, such as cloth, paper or leather, caused by fungi, especially under damp conditions. Mildew is often used interchangeably with the word "mold." Both are generic terms that describe a variety of microorganisms, including fungi, algae, rusts, yeasts, and bacteria. Mildew requires three elements to survive and thrive: a warm climate, a food source, and moisture. This makes it a natural enemy to campers, homemakers, and college students everywhere.
Mildew is prevalent in the warmer periods of the spring, summer, and fall. Mildew does not discriminate. It can manifest anywhere. So you may have to remove mildew stains from clothes, towels, jackets, upholstered car seats, the car trunk, on basement carpeting, on bathroom tiles, and shower curtains.
Mildew Stain Removal from Clothes & Fabrics
Solution 1:
1. Before removing mildew stains, take the item outside and brush off as much mildew as possible. This will prevent scattering the mold spores in the house.
2. Do one of the following:
If chlorine bleach is safe for the fabric, launder, using chlorine bleach and the hottest water that's safe for the fabric.
If chlorine bleach is not safe for the fabric, soak in oxygen bleach and hot water for at least 30 minutes, and then launder.
3. If possible, take the item outside and let it dry thoroughly in the sunlight.
Solution 2:
1. Soak overnight in lemon juice or salty water.
2. Wash in warm soapy water
3. Rinse well and dry in the sun.
Mildew Stain Removal from Carpets & Upholstery
Solution 1:
If there are mildew stains on the surface of the carpet, you must be careful not to add any more moisture to the area.
1. Vacuum the surface to draw out as much of the mildew as possible. Afterward, replace the vacuum-cleaner bag or remove the canister and clean outside.
2. Vigorously mix one tablespoon liquid laundry detergent and two cups cool water to create a froth of suds.
3. Using a damp cloth, apply the suds to the stained area. Sponge gently. Repeat until the stain disappears.
4. Rinse.
5. Thoroughly dry the area.
Mildew Stain Removal from Tiles
Solution 1:
1. Make sure that the room is well ventilated before treating the mildew.
2. Spray a tile cleaner on the tiles and shower curtain according to manufacturer’s instructions, or pour white vinegar into a spray bottle and spray the tiles and shower curtain.
3. Scrub with a brush or sponge.
4. Rinse well with water.
5. If the stain remains, mix a 10% bleach solution and pour it into a spray bottle. Spray the bleach mixture onto the stain. Let stand several minutes, then rinse well with water.
Mold
It's a home invasion, all right. Mold is an intruder that can destroy fabrics and upholstery, disintegrate wall paper and trigger allergies. But with some simple tools and stain removal know-how, you can defend your home against this micro menace – Mold Spot Removal Solutions
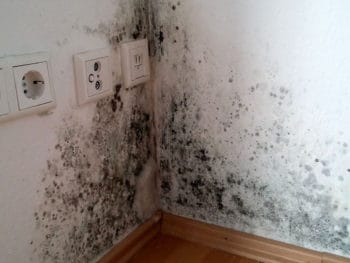
Mold flourishes in damp, warm, dark, places. Moisture can come from dripping pipes, a leaky roof, or simply high humidity. When conditions are right, mold begins to grow within 24-48 hours and will continue unabated until you address the problem.
To prevent mold, dry out water-damaged areas as soon as you notice them. Keeping your house clean, dry and well-ventilated will prevent most mold problems. Cleaning with soap and water will often take care of mold stains, but actually killing mold requires the power of bleach. Don't use straight bleach, though – it's too powerful and can create toxic fumes. You need to water it down a bit.
For mold stain removal from the bathroom – one of the most common areas of infestation – mix 1 part bleach with 11 parts water. Wear rubber gloves and use a sponge, cloth or soft-bristled brush to apply the solution. Rinse with a damp sponge and then wipe down the area with a squeegee. Turning on a vent fan before showering, or opening a window after showering cuts down on moisture retention in the bathroom. This can prevent the task of removing mold stains.
To remove musty odors in the basement – another mold breeding ground – sprinkle chlorinated lime (also known as bleaching powder) over the floor. Let it soak up the odor for a day and then sweep or vacuum it up. If you use a vacuum, dispose of the bag afterwards. If you sweep with a broom, collect the residue in a dustpan and dispose of it outdoors. You can also get rid of musty mold smells by spraying with a bleach solution.
To remove mold stains from clothes and fabrics or upholstery, take the item outside. Begin by knocking off the surface mold with a stiff brush and then air the piece in the sun. If spots remain, wash the item according to the manufacturer's instructions. Use hot water and laundry bleach if the fabric can tolerate it.
To remove mold stains from carpets, vacuum the surface to draw out as much of the mold as possible. Afterward, replace the vacuum-cleaner bag or remove the canister and clean outside. Vigorously mix 1 tablespoon liquid laundry detergent and 2 cups cool water to create a froth of suds. Using a damp cloth, apply the suds to the stained area. Sponge gently. Repeat until the stain disappears. Rinse and thoroughly dry the area.
For mold stain removal from leather, use a solution of alcohol and water. Combine 1 cup of isopropyl alcohol with 1 cup of water. Dip a clean cloth in the solution, wring it out, and wipe the affected area. Follow with a cloth dampened only with water and then dry the item in an airy place.
For removing mold stains from tile grout, pour 1 tablespoon of bleach into a 1 liter spray bottle and fill up with water. Spray the tile walls, and then mold will fade away. For severe cases of mold, try adding just a tad more bleach to the mixture.
Mustard
It's a favorite condiment enjoyed the world over, but when it drips on your clothes rather than on your food, it's not quite so enjoyable. What makes mustard stains extra-tricky is that they naturally contain Turmeric, a natural dye that sticks incredibly well to fabric – Mustard Spot Removal Solutions

A pungent powder or paste prepared from the seed of the mustard plant, used as a food seasoning or condiment, and medicinally in plasters, poultices, etc. Varieties of mustard include Chinese, English, German, and Dijon. Mustard is the second most popular condiment in the United States (ketchup being the first).
Due to the ubiquitous presence of fast food, the need to remove mustard stains occurs year-round. The popularity of backyard grills leads to an increase in the overall prevalence of mustard in spring and summer. Mustard is a wily substance that will plop from unexpected places. The fronts of shirts, dresses, pants, shorts, and skirts are popular spots for removing mustard stains.
Mustard Stain Removal from Clothes & Fabrics
Solution 1:
1. Remove as much of the mustard as possible using a dull straight edge.
2. Flex the fabric to break the grip of the embedded residue on the fabric fibers.
3. Apply glycerin (hand cream section, drugstore) and let it sit at least an hour.
4. Pre-treat and launder as usual.
5. If the fabric is white or colorfast, soak the stain in hydrogen peroxide for 30 minutes.
Solution 2:
1. Treat with a prewash stain remover, or dampen with water and rub with bar soap.
2. Launder with chlorine bleach, if safe for that fabric, or use an all-fabric bleach.
Mustard Stain Removal from Carpets & Upholstery
Solution 1:
1. Scrape off excess mustard.
2. Mix 1 tablespoon of liquid hand dishwashing detergent with two cups of warm water.
3. Using a clean white cloth, sponge the stain with the detergent solution.
4. Blot until the liquid is absorbed.
5. Repeat Steps 3 and 4 until the stain disappears.
6. If the stain remains, mix 1 tablespoon of ammonia with two cups of warm water.
7. Sponge the stain with the ammonia solution.
8. Blot until the liquid is absorbed.
9. Sponge with cold water and blot dry to remove the ammonia solution.
Solution 2:
1. For fresh stains, use a dull knife or spoon to remove as much as possible. If the stain is dry, first rub glycerin into it and let stand until loosened, up to 1 hour, then scrape away as much as possible.
2. Blot the stain with a damp absorbent cloth.
3. If the stain remains, treat with a carpet spotter.
4. Lighten any remaining color stain with a mild bleach, such as hydrogen peroxide, white vinegar or lemon juice.
5. Blot with water.
Nail Polish
Do you do your own nails? If so, there is sure to be a time that you have spilled nail polish on your clothing or carpet. The only way to keep from having nail polish accidents is to do your nails naked in the backyard – Nail Polish Spot Removal Solutions
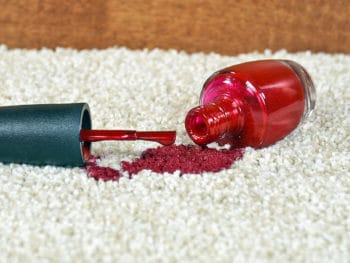
A cosmetic lacquer that dries quickly and that is applied to the nails to color them or make them shiny. Fingernail polish often contains four or five chemicals the U.S Environmental Protection Agency calls potentially harmful.
Fashionable ladies (and even some gentlemen) apply nail polish at all times of year, particularly when special occasions are on the agenda. However, during the warm months of spring and summer, when sandals are standard attire, the chances of having to remove nail polish stains double. You can find yourself needing to get rid of nail polish stains from almost anywhere if hands or feet are used too soon after application.
Nail Polish Stain Removal from Clothes & Fabrics
Solution 1:
1. Apply nail polish remover to the back of the stain while laying the fabric on white absorbent towels. Replace towels frequently.
2. Rinse and launder.
Solution 2:
1. Soak one pad of cotton wool or similar in amyl acetate.
2. With the solvent pad under the stain and a clean pad on top, dab the stain.
3. When some of the stain has transferred to the top pad, turn it over so its clean side is in contact with the fabric and repeat.
4. Change the top pad and continue working until no stain comes through.
5. Wash as usual.
Nail Polish Stain Removal from Carpets & Upholstery
Solution 1:
1. Blot up as much polish as possible with a tissue or anything handy.
2. Test the effect of non-oily nail polish remover on an inconspicuous part of the carpet.
3. If there are no ill effects to the carpet pile, apply the nail polish remover with an eye dropper or a non-silver spoon, blotting immediately after each application.
4. If regular nail polish remover does not work, buy straight acetone at a beauty supply house, pretest again, and apply as directed above.
5. If color staining remains, apply hydrogen peroxide to bleach or lighten the stain.
Solution 2:
1. Dab the stain with non-oily nail polish remover on a cloth.
2. Sponge with mild detergent (1 teaspoon neutral detergent – that is, no alkalis or bleaches – in 1 cup lukewarm water).
3. Finally, sponge with clean water.
Oil (Motor, Cooking, Olive)
Whether it's a cooking, automotive or lubricating oil mark, the sooner you deal with an oily stain, the better the outcome. Follow the directions below to minimize the risk of permanent stains – Oil Spot Removal Solutions
Paint (Water-Based, Oil-Based)
Painting your house isn't exactly a walk in the park, but if you get paint stains on your clothes or carpet, an afternoon of home improvement can turn into a real mess. Act quick with these stain removal tips – Paint Spot Removal Solutions
Permanent Marker
As the name indicates, permanent markers are permanent – so you may not be able to remove stains completely. You can lighten the stain significantly though, and may be able to lighten it enough that it will be hardly noticeable – Permanent Marker Spot Removal Solutions

A type of marker pen that is used to create permanent writing on an object. Removing ink stains from a permanent marker is no easy task – the substance's very existence depends upon its tenacity. Lab workers can spend years developing formulas that will be absolutely impossible to remove and this feature is the main selling point for consumers.
Permanent ink is a stain without season – it is not bound by weather or month. Prime spots to remove permanent marker stains are shirts, especially sleeves and cuffs, as well as pants.
Tip: This stain needs immediate treatment. Check the ink manufacturer to see if a particular solvent is recommended; use this before employing the stain removal steps that follow.
Permanent Marker Ink Stain Removal from Clothes & Fabrics
1. Try pouring water through the stain before it dries, until pigments are removed.
2. Allow to dry.
3. If you notice some reduction in stain, sponge with dry-cleaning solvent.
4. Allow to dry.
5. Rub liquid household cleaner into stain.
6. Rinse.
7. Soak stain (possible overnight) in warm water to which 1 to 4 tablespoons of household ammonia have been added.
8. Rinse and repeat treatment if necessary; launder.
Permanent Marker Ink Stain Removal from Carpets & Upholstery
1. Moisten the stain lightly with rubbing alcohol or hairspray and lightly blot with a white towel.
2. You should see the marker marks being transferred to the towel.
3. Repeat to remove as much of the marker stain as possible.
4. Once the stain is gone, moisten the area with water and then blot with a clean, dry towel until the carpeting is dry.
Permanent Marker Stain Removal from a Hard Surface (such as wood, paneling, or tile)
1. Dampen a cloth with nail polish remover or rubbing alcohol and wipe stain.
2. Rinse surface with water.
3. Repeat steps 1 and 2 as needed.
Pets
People love their pets, but don't love dealing with the nasty stains of urine and feces these animals leave behind. Pet stain removal is a twofold task – you not only need to remove the actual stain, but need to deal with the odor problem associated with it – Pet Spot Removal Solutions
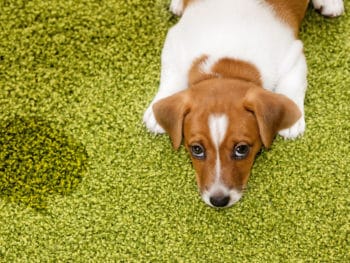
Urine Pet Stain Removal
Anybody who has ever tried to potty train a puppy, kitten or a baby knows about urine – the smell, the color – yuck! These removal techniques will erase any trace of urine stains. If only they could do the same for memories of the potty-training process. Below are solutions on how to remove pet stains of urine from clothes & fabrics and removing pet stains of urine from carpets & upholstery.
The waste product secreted by the kidneys that in mammals is a yellow to amber-colored, slightly acid fluid discharged from the body through the urethra. Urine stains are usually yellow and are always embarrassing. Whether the stain is made by an excited dog or a crying baby, it should be removed as soon as it occurs.
Urine stains can happen at any time. With babies, all garments are at risk, and with pets, carpets and upholstery tend to be the main victims.
Urine Pet Stain Removal from Clothes & Fabrics
Solution 1:
For fresh urine stains –
1. Lightly blot the mark with a dry sponge to absorb as much excess liquid as possible.
2. Dab area very gently with undiluted vinegar.
3. Sponge with cold water.
Solution 2:
For dried urine stains –
1. Soak and agitate stain in cold water up to 1 hour.
2. Rub a liquid enzyme detergent into stain and let stand for several minutes.
3. For persistent stains, rub with detergent, then soak in cold water for 30 minutes to 1 hour.
4. Launder according to garment label.
5. If the stain remains, launder with a bleach that is safe for the fabric. Test first for colorfastness.
Urine Pet Stain Removal from Carpets & Upholstery
Solution 1:
For fresh urine stains –
1. Blot, then sponge with clean water.
2. Sponge with ammonia solution (1 tablespoon household ammonia in 1/2 cup water).
3. Sponge with mild detergent (1 teaspoon neutral detergent – that is, no alkalis or bleaches – in 1 cup lukewarm water).
4. Finally, sponge with clean water.
5. After the carpet has dried, sprinkle baking soda over the area to get rid of any lingering smell. Apply it to the area and leave it for at least 24 hours, then vacuum it up. The smell should be gone.
Solution 2:
For dried urine stains –
1. Sponge with mild detergent (1 teaspoon neutral detergent – that is, no alkalis or bleaches – in 1 cup lukewarm water).
2. Sponge with vinegar solution (1/3 cup white vinegar in 2/3 cup water).
3. Sponge with ammonia solution (1 tablespoon household ammonia in 1/2 cup water).
4. Repeat step 1.
5. Sponge with clean water.
6. Follow step 5 from Solution 1 above.
Feces Pet Stain Removal
It can happen for a variety of reasons such as small children, if someone is really sick, if you have pets, or possibly you have an overflow or a back up in the bathroom. Excrement stains may not be an easy one for you to tackle but you know it has to be done. Below are solutions on how to remove pet stains of feces from clothes & fabrics and removing pet stains of feces from carpets & upholstery.
Waste matter eliminated from the bowels; excrement. There's no getting around the fact that most people turn up their noses at a feces stain. Even though it comes from the body and is natural, it's just not terribly pleasant stuff. Many people are used to dodging doggy-do on the sidewalks, but that's a less common sight these days due to more stringent laws.
Since both people and animals must empty their bowels regularly, even daily, feces stains can occur any time of the year. When changing a baby or cleaning out the litter box, those who neglect to roll up his or her sleeves beforehand may fall victim to this particularly nasty stain. The same goes for cleaning up after Rover in the park.
Early morning or late night, are the most common hours for incurring a feces stain while cleaning up after a pet or changing a baby.
Feces Pet Stain Removal from Clothes & Fabrics
Solution 1:
1. Use a dull knife or spoon to remove as much as possible.
2. For fresh stains, soak and agitate the fabric thoroughly in cold water. For dried stains, soak fabric in a soapy mixture of cold water and liquid enzyme detergent for 30 minutes or until the stain has loosened.
3. Rinse well.
4. If the stain remains, rub a liquid enzyme detergent into the stain and let stand several minutes.
5. Launder according to garment label.
6. If the stain remains, soak in an enzyme detergent mixture and cold water mixture up to 30 minutes.
7. Rinse Well.
8. Apply a laundry presoak (spot stain remover) and launder again. On white fabrics, especially baby clothes, bleach any remaining stain by blotting with lemon juice and setting to dry in the sun.
Feces Pet Stain Removal from Carpets & Upholstery
Solution 1:
1. Use a dull knife or spoon to remove as much as possible.
2. Blot the stain with paper towels or an old white towel to absorb any moisture.
3. Blot the spot with a terry-cloth towel dipped in white vinegar.
4. When dry, fluff up the area with your hand or a soft brush.
5. After the carpet has dried, sprinkle baking soda over the area to get rid of any lingering smell. Apply it to the area and leave it for at least 24 hours, then vacuum it up. The smell should be gone.
Solution 2:
1. Follow steps 1 and 2 above from Solution 1.
2. Blot the area with club soda, then cover with a dry white towel and weight it down with some heavy books so the towel can absorb the moisture from the rug. If the towel becomes damp, replace it with a dry one.
3. Follow step 5 from Solution 1.
Pollen
You've just been given a beautiful bouquet of flowers and you're delighted until you notice the bright orange stains on your shirt and on the carpet. Don't worry, you don't have to be stuck with those pollen spots forever – Pollen Spot Removal Solutions
The fertilizing element of flowering plants, consisting of fine, powdery, yellowish grains or spores, sometimes in masses. Most plant pollen is highly flammable, exploding when placed on an extremely hot surface. In the early days of modern theater, artificial lightning was produced by throwing pollen grains onto a hot shovel. These days, you are more likely to encounter pollen outdoors, in its natural element, than backstage or on a movie set.
Hay-fever sufferers know that pollen is in season during the spring, summer, and winter months in most climates. You may find yourself removing lily pollen stains after working in the garden or tending to fresh flowers. Pay attention to those beautiful lilies in early spring, with their huge stamens quivering with pollen, ready to inflict a bright yellow spot on your finest spring attire. Pollen has become popular as a source of natural vitamins and minerals, increasing the chances of having to remove lily pollen stains year round.
Pollen can stain pant legs and skirts as you wander through the garden or across a field of goldenrod. Pollen can also color the sleeves and fronts of shirts, particularly when you are flower arranging. In early summer, trees drop pollen all over streets and cars, making this stain nearly impossible to avoid, as it shows up on shoes, socks, and even jackets and pants.
Lily Pollen Stain Removal from Clothes & Fabrics
Solution 1:
1. Sponge, then flush with dry-cleaning solvent. Let air dry.
2. Rub gently with detergent.
3. Launder as usual, using bleach that is safe for that fabric.
Solution 2:
1. Shake garment outdoors to remove loose pollen.
2. Use a dull knife or spoon to remove as much as possible.
3. Rinse the back of the stain well with cold water.
4. Soak garment in cold water until the stain is loosened.
5. Rinse well.
6. Repeat steps 3 through 5 until you have removed as much stain as possible.
7. If the stain remains, apply a laundry presoak (spot stain remover) and let stand several minutes.
8. Launder in the hottest water safe for the fabric.
Lily Pollen Stain Removal from Carpets & Upholstery
Solution 1:
1. Vacuum off the pollen particles.
2. Use the sticky side of a piece of tape to carefully lift off the remaining particles.
3. Using a clean white cloth, sponge the stain with a dry-cleaning solvent.
4. Blot until the solvent is absorbed.
5. Repeat Steps 3 and 4 until the stain disappears.
Red Wine
You're at a party and someone accidentally bumps into you, spilling your glass of red wine all over the show. What do you do? Don't cry over your spilled wine and don't panic – Red Wine Spot Removal Solutions
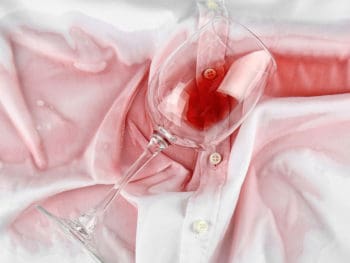
Wine having a red color derived from skins of dark-colored grapes. Merlot and Cabernet Sauvignon are popular varieties. The strong, bold flavors of red wine produce just as strong and unwieldy stains. Though red wine is served year-round, removing red wine stains is more likely in fall and winter when most people prefer to drink the heartier red wines.
You may be required to remove red wine stains anywhere on the fronts of shirts and dresses, as well as pant legs and skirts as the hours grow later and splashes occur. During a particularly engaging dinner party or gathering of friends, a red wine stain may not be detected until later in the evening, or even the next morning, depending on the amount consumed.
Tip: Learn to pour like a wine steward, slowly twisting the bottle neck to the side as you finish pouring so that drips will stay inside the bottle. Instead of laying your cork on the tablecloth, use a dish or ashtray to prevent unnecessary red wine stains.
Red Wine Stain Removal from Clothes & Fabrics
Solution 1:
Fresh red wine stain –
1. Sprinkle a red wine spill immediately with a liberal amount of salt.
2. Allow the salt to absorb the wine, and then rinse in cool water.
3. Apply liquid laundry detergent and rinse in cool water.
4. If the stain remains, apply a paste made from bleach-enzyme laundry soap such as Biz (mix according to package directions), soak for 30 minutes in an all-fabric bleach, and then launder.
Dried red wine stain on durable fabric –
1. For dried stains on durable fabrics, such as a tablecloth, hold the stained area over a bowl and cover with salt.
2. Pour boiling water over the salt until the stain disappears.
Dried red wine stain on other fabrics –
1. On other fabrics, soak with a few drops of white vinegar and blot, or try soaking with a solution of hydrogen peroxide (a mild bleach) and a few drops of ammonia.
Solution 2:
1. Blot with paper towels or a dry cloth.
2. Sprinkle with white wine, which is acidic, to neutralize the stain, or water, and blot again. Remove the remaining stain with a clean cloth and methylated spirits.
Red Wine Stain Removal from Carpets & Upholstery
Solution 1:
1. Blot up as much wine as possible with an absorbent cloth.
2. Saturate the stain with soda water or cold water.
3. Repeat steps 1 and 2 as needed.
4. If red wine stain remain, make a paste of borax or baking soda and water at a ratio of approximately 3 to 1. Smear paste onto stain with an old toothbrush and let dry.
5. Vacuum.
6. Repeat until no more stain can be removed.
7. If the stain still remains, treat with a carpet spotter.
Solution 2:
1. On rugs and carpets, immediately cover the spill with a generous amount of salt.
2. Allow it to dry, and then vacuum.
Red Wine Stain Removal from Walls
If you have spilt red wine on a washable painted wall, don't despair but wipe it off immediately.
Damp a cloth with bleach and gently wipe the wall. When using bleach, always remember to wear gloves and to avoid contact with your skin and eyes.
Also remember to take a break from cleaning, sit down, maybe sip what's left of your wine and play some casino for iphone.
If your wall is not washable or the stain is on the wallpaper, rub it gently with a melamine foam eraser (you can easily find it at drugstores).
Roof
Moss, algae, and mildew adore your roof. Embark cautiously on do-it-yourself roof stain removal. When you combine a steep pitch with the use of ladders and cleaners that make the roof slippery, you have a recipe for potential disaster hanging over your head – Roof Spot Removal Solutions
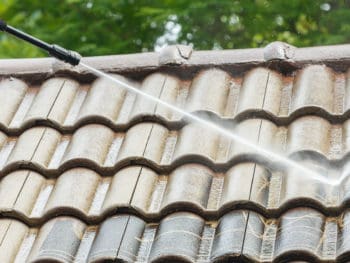
This is your guide to roof stain removal. Moss, algae, and mildew adore your roof. Embark cautiously on do-it-yourself roof cleaning. When you combine a steep pitch with the use of ladders and cleaners that make the roof slippery, you have a recipe for potential disaster hanging over your head.
Use thisUniversal Roof Stain Removal Formula when your roof gets dirty. The concoction gets rid of roof spots such as mildew and moss.
You need these ingredients:
- 1 cup liquid chlorine bleach
- 1 cup powdered laundry detergent
- 1 gallon hot water
Add the bleach to the water and then add the detergent. Mix the ingredients until the soap granules dissolve. Pour the mixture into a garden sprayer. Apply the liquid onto the affected area, and keep it wet for at least 15 minutes. Use a broom to scrub the surface. Rinse with a garden hose.
Tip: A pressure washer works best. Just be careful not to damage the roof with the force of the spray. Hold the spray tip back about 12 to 18 inches from the roof.
Tiled roofs can attract roof stains such as moss and other growth. Cleaning them yourself is not recommended because wet tiles are delicate and extremely slippery. If you aren't agile or athletic, or if you have a fear of heights (or falling), think about hiring someone to maintain your roof. However, if you don't want to hire a professional to remove roof stains then follow this advice tostay safe:
If you go up there, be sure to wear rubber-soled shoes. They grip better than leather.
Wear a safety harness when removing roof stains. Safety harnesses have fabric straps that wrap around your legs, your waist, and the trunk of your body. You connect them to a rope that's securely anchored to a tree trunk – or other fixed and secure object – located on the other side of the roof.
If you're cleaning your roof, applying a preservative, or doing some other similar task, never stand downhill of your work. You can very easily slip on the wet surface. Always stand uphill of your work.
Use binoculars to inspect your roof if you want to take a close look at your roof but don't want to climb up there to do it.
To create an inhospitable environment for growth on your roof, apply zinc strips close to the top (or comb) of the roof. Rainwater reacts with the zinc and drips down the roof, discouraging growth. To get the strips, visit a roofing supply company. This may prevent the need to remove roof stains.
Asbestos roofs, both tiles and sheeting, can be cleaned with high-pressure hoses, but this may only be done by professional firms who specialize in asbestos work. All the run-off must be captured and disposed of at a hazardous-waste site.
Corrugated iron roofs are either painted or unpainted. Unpainted roofs can be cleaned by washing down with soap and water – avoid anything acidic. Alternatively, rub the roof down with a galvanized pre-cleaner, which is slightly abrasive and available from hardware stores. Painted roofs can also be cleaned with soap and water to remove surface dirt prior to repainting.
Rug
The best way to keep a rug looking fresh is to keep it from getting dirty in the first place. Remove your outdoor shoes when entering the house and you'll cut down on 80 percent of the dirt tracked in. But for now, use these tips – Rug Spot Removal Solutions
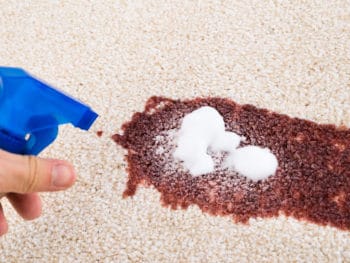
This is your guide to rug stain removal. The best way to keep a rug looking fresh is to keep it from getting dirty in the first place. Remove your outdoor shoes when entering the house and you'll cut down on 80 percent of the dirt tracked in. Keep a basket of clean socks and fresh slippers by the door for guests. This alone can make rug stain removal a thing of the past.
Give rugs a good, regular shake outside. Vacuum them often, front and back, against the nap to pick up ground-in dirt. Rugs in high-traffic areas need a more thorough cleaning at least once a year; those in out of the way places, less often.
For general cleaning and minor rug stain removal, follow these steps to shampoo a small rug:
1. Vacuum the rug.
2. Mix ½ cup mild dishwashing liquid or carpet shampoo with 1.75 liters of cool water in a clean bucket. (Don't use harsh detergents, cloudy ammonia, or regular ammonia on your rugs.) Aerosol carpet sprays also work well on smaller rugs or small areas of carpeting. There are a number of products on the supermarket shelves. Test the cleaner you're using on a hidden spot to make sure the rug is colorfast.
3. With a long-bristled, soft brush or a firm, non-shedding sponge, brush the solution on the pile in the direction of the nap. Don't scrub. Wet thoroughly.
4. Wash the rug's fringe, if any. If the floor is wood or otherwise easily damaged by water, place a plastic or rubber drop cloth or sheet under the fringe. Then put a clean white towel on top of that (still beneath the fringe). Using a brush or sponge moistened (not sopping) with the cleaning solution, brush the fringe from the knots out to the end. To rinse, replace the first towel under the fringe with a dry towel and blot the fringe with yet another towel dampened with warm water. Allow the fringe to dry on a third dry towel.
5. To rinse the main part of the rug, wet clean rags with warm water and press them against the rug.
6. Squeeze out excess. (A window squeegee works well.) Squeegee the pile in the direction of the nap until no more water comes out. Use more towels to mop up any excess.
7. If you have plastic underneath the rug and it's now wet, replace it with dry plastic. Lay down dry towels and lay the rug flat on the towels to dry thoroughly on one side. Then flip it over to dry the other, replacing the towels again if need be. Another technique: dry the rug on a picnic table in the shade outside.
8. If the pile feels stiff, vacuum or brush it gently.
For rug stain removal, several rules of thumb apply. Attack problems in this order:
Blot rug stains, using clean rags or absorbent white towels.
Scrape up whatever solids you can, using a kitchen knife, spatula or putty knife.
Work from the stain's outer edges to its center, rather than from the inside out, which could spread the stain.
If the stain has penetrated the entire rug, place a clean rag underneath the rug to absorb what seeped through.
Dilute rug stains by blotting with a cloth dampened with water or plain soda water (no flavors).
For cleaning rug stains, first try a dab of rug cleaner, such as Johnson Carpet Science Spot and Stain Remover or Afta Dry Cleaning Solvent and Stain Remover, according to package directions. (Test first on a hidden area). See Commercial Stain Removers A-Z for more stain removal products.
If this doesn't work, mix 1 teaspoon of mild dishwashing liquid with 1 cup of warm water. Blot with a white towel dampened with clear water. Don't saturate.
Shaving cream can also work wonders for rug stain removal. Moisten the spot with water, work in the shaving cream and rinse with a clean rag dampened with cool water.
Mix 1 tablespoon of household ammonia with ½ cup of water. Dab the solution on with a clean rag. Then mix ½ cup of vinegar and 1 cup of water. Blot this mix on to curb the ammonia's action. Rinse with a clean rag dampened with cool water.
Mix enough powdered enzyme laundry detergent with water to make a paste. Be sure the detergent has no bluing or whitening agents. Let the paste stand for 10 minutes and then remove any residue with a wooden spoon. Blot with a clean towel and rinse with another towel wrung out in warm water.
Rust
Has your favorite fabric or carpet been attacked with a rust stain? Hold on, you don't have to throw it away! You'd be surprised at what the help of a little lemon could do; just follow these simple steps – Rust Spot Removal Solutions
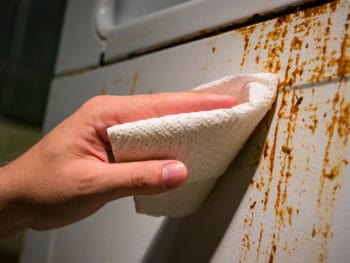
Rust is the reddish brittle coating formed on iron especially when chemically attacked by moist air and composed essentially of hydrated ferric oxide. Rust is an inevitable result of metal meeting the outdoor elements. This means that there is the potential to have to remove rust stains from just about anywhere. In moderate climates, rust stains develop at all times of the year, as the weather takes its toll on any unprotected metallic surfaces.
Although rust can present itself in any number of places, removing rust stains from sweatshirts, sweatpants, and jeans is most likely. Rust stains are almost always met with a look of surprise from their victims. For example, most people don’t think to check under a metal seat before sliding a coat underneath it.
Rust Stain Removal from Clothes & Fabrics
Solution 1:
1. Mix 1 heaped tablespoon of table salt in the juice of 1 lemon.
2. Soak the stain in this solution for 1 hour, rinse and then wash as usual.
3. Dry in the sun if the color of the fabric will not be harmed by the bleaching action of strong sunlight.
4. Repeat as necessary.
Solution 2:
1. Flood the stain with lemon juice and leave for 10-15 minutes.
2. Place a damp cloth over the stain and iron.
3. Repeat several times as necessary.
4. Rinse and wash as usual.
Rust Stain Removal from Carpets & Upholstery
Solution 1:
1. Try to scrape off as much of the rust as you can with a dull utility knife blade.
2. Saturate the entire stain with lemon juice (fresh-squeezed or bottled) sprayed from a spray bottle.
3. Allow the juice to remain for at least 5 minutes, but no longer than 10 minutes.
4. Blot the stain with a white paper towel. Do not rub the stain in.
5. Use liquid dishwashing detergent on the stain if the lemon juice doesn't do the trick. Thoroughly mix about 1/4 tablespoon detergent with 1 quart of water.
6. Apply the detergent mixture to a clean, damp, white towel and gently blot the solution into the stained area until the stain is removed.
7. Spray water onto the area with a spray bottle and blot until the detergent solution and water are gone.
8. Allow the carpet to dry thoroughly before vacuuming.
Semen
Sexual pleasure is not something you should be ashamed of since it comes naturally, but indelible semen stains are another thing. Follow these tips on semen stain removal and say goodbye to the embarrassment of having other people see your sticky smudges – Semen Spot Removal Solutions
The viscid, whitish fluid produced in the male reproductive organs, containing spermatozoa. On average, a man ejaculates fourteen gallons of semen in his lifetime, and reproduces only an average of about 1.2 children, in the United States. This amounts to quite a bit of semen that does not reach its destination, which in turn leads to quite a few stained sheets.
Sheets, pants, underwear, and towels are common places for removing semen stains, but it is possible for semen to wind up on any piece of clothing after being swept up in the moment. Semen has been discovered as far from the mark as the floor, a T-shirt, pajama top, dress, the pillowcase, even a curtain, following extreme carelessness. This stain may occur at any time, but it's common to have to remove semen stains in the early morning and late night. Stains are usually found in the morning, either because they've just been created, or because daylight exposes evidence from last
night's activities.
Semen Stain Removal from Clothes & Fabrics
Solution 1:
1. Hold fabric stain-side down under cold running water to force water through fabric.
2. Soak and agitate the fabric in cold water until loosened.
3. If the stain remains, rub liquid laundry detergent into the stain and let stand several minutes.
4. Launder according to garment label.
Semen Stain Removal from Carpets & Upholstery
Solution 1:
1. Create a paste from baking soda and water.
2. Apply paste to the spot on the carpet, and scrub with a brush. Once the spot is loosened, use cold water and a towel to wipe it up.
3. Repeat steps 1-2 until stain is gone.
4. Vacuum.
5. Sprinkle baking soda over the spot and let sit for 1 hour. This will eliminate the odor and absorb the rest of the moisture from the carpet.
Solution 2:
1. Scrape off the hard stuff with a dull knife.
2. Blot the area with cold water and a paper towel. Since semen is a protein, avoid hot water, as it will set the stain.
3. Create a dishwasher detergent and cold water mix and blot.
4. Blot with cold water and paper towel.
Shoe Polish
Shoe polish is a quick and easy way to breathe new life into shoes that have seen better days. Unfortunately, while it can restore shoes to their former glory, it can destroy clothing and carpeting – Shoe Polish Spot Removal Solutions
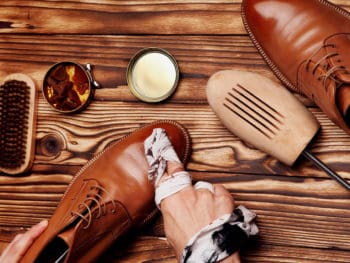
A substance used to produce a shiny protective surface on footwear. Shoe polish is a necessity for any style-conscious person, but its uses don't end with the feet. It's a must have for children at Halloween, or any time you need to darken your face or hands and no makeup is available. Popular colors include black, brown, blue, and white.
The act of removing shoe polish stains occurs year-round, but the colors vary with the time of year. White shoe-polish stains are only incurred in the summer, as long as style guidelines are followed to the letter. Brown and black shoe-polish stains should only occur in the colder months. Additionally, as noted above, October 31 will see an increase in people having to remove shoe-polish stains of every color.
Pant-leg and dress-shirt cuffs are the areas most affected by this stain. Suit jackets can be marred when the polisher is hurried. In rare instances, pantyhose, socks, and tights may fall victim to this stain. In train and bus stations around the world, busy commuters get their shoes polished before or after work; therefore, morning and evening rush hours are common times to obtain this stain. Costume parties are also a time to look out for the shoe-polish stain.
Shoe Polish Stain Removal from Clothes & Fabrics
Solution 1:
1. Work laundry detergent into the fabric immediately and rinse.
2. For persistent stains, sponge with alcohol. Use undiluted alcohol on white clothes, and 1 part alcohol to 2 parts water on colored fabrics.
3. Rinse again, or try using turpentine after first testing in an inconspicuous spot.
4. Shoe polish has an oily base containing dye. Using the wrong things such as water, heat, or wet spotters will spread and set the stain. Work in vegetable oil or WD-40 Lubricant and let it sit for 15 minutes.
5. Sponge on a little ammonia (not on silk, please), then work in undiluted dishwashing liquid and launder as usual.
6. If you have any discoloration remaining from the dye in the shoe polish, soak the fabric in bleach until the stain is removed.
7. If the shoe polish stain is old and heavy, you may need to treat it with petroleum jelly. Cover the polish and work in the petroleum jelly, let it soak for 30 to 60 minutes, and then scrape off all that you can of the polish and the petroleum jelly.
8. Work in undiluted dishwashing liquid and flush with a forceful stream of hot water.
9. Pretreat and launder as usual.
Solution 2:
For liquid shoe polish stain removal –
1. Blot up all that you can from the fabric. Do not rub – this will spread the stain. Do not apply water.
2. Saturate with alcohol – undiluted for whites, diluted as above for colors.
3. Continue to flush with alcohol, work in your favorite laundry detergent, then rub vigorously to remove all traces of the stain.
Shoe Polish Stain Removal from Carpets & Upholstery
Solution 1:
1. Scrape off as much polish as possible.
2. Sponge the stain with a dry-cleaning solvent.
3. Blot until the liquid is absorbed.
4. Mix 1 tablespoon of liquid hand dishwashing detergent and 1 tablespoon of ammonia (Caution: Never mix chlorine bleach and ammonia – the resulting fumes are hazardous) with 2 cups of warm water.
5. Using a clean white cloth, sponge the stain with the detergent/ammonia solution.
6. Blot until the liquid is absorbed.
7. Sponge with cold water and blot dry.
Silk
When cleaning silk, you don't want to turn a silk purse into a sow's ear by using the wrong technique. Many silk garments are washable if you are careful – Silk Spot Removal Solutions
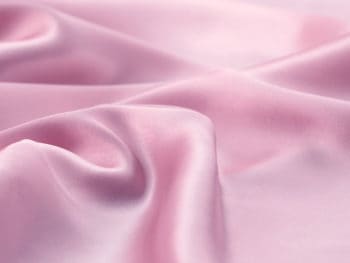
When cleaning silk, you don't want to turn a silk purse into a sow's ear by using the wrong technique. Many silk garments are washable if you are careful. Check the fabric care label.
Treat stains from spills and such before you wash silk clothing. (See below for special ways to treat perspiration and deodorant stains.) On a hidden spot, apply a paste of powdered laundry starch and cold water to make sure the silk is colorfast. If it is, apply the paste to the stain, let it dry, and brush it away.
To wash a silk garment, you can either do it by hand or use the delicate cycle and cool or warm water in your washing machine. A mild detergent, such as Woolite, works best. Carefully roll the garment in an absorbent white towel to blot up excess moisture. Then either lay it flat to dry or hang it on a padded hanger.
When cleaning silk, always keep these precautions in mind:
- Never use chlorine bleach; it can irreparably damage the fabric.
- Never dry silk in sunlight; it will fade.
- Never wash silk ties; both the silk and its lining are prone to shrinkage. (The lining will usually shrivel first.) Instead, take them to a dry cleaner.
- When you're dressing, apply hair spray, makeup and other beauty and grooming aids before donning anything made of silk. The alcohol in them could cause dyes to bleed.
To iron silk, use a low setting and iron on the inside of the garment only.
Perspiration and deodorant stains can discolor and weaken silk. (The salt in perspiration, and aluminum chloride and other chemicals in deodorants and antiperspirants, can stain silk.) Dry-clean or wash perspiration-stained garments as soon as possible.
To treat perspiration or deodorant stains on washable silk garments, try one of these remedies, but first test it on a hidden spot to see whether the fabric dye holds:
- Soak the perspiration stain in warm water and a paste of table salt and white vinegar.
- Make a paste of cream of tartar and warm water and apply it to the stain. Allow the paste to dry for silk stain removal, then brush it off and launder.
- Dissolve 2 aspirins in ½ cup of warm water and apply it to the stain. Let it dry for hours, brush it off and launder.
Soda
Soda, or soft drink, comes in many colors. When soda is spilled onto your clothing or carpet, it leaves those same colors. These sticky and ugly spots need to be removed quickly before they set in permanently – Soda Spot Removal Solutions

A non-alcoholic, flavored, carbonated beverage, usually commercially prepared and sold in bottles or cans. Coca Cola is the most popular soft drink in the world, though perhaps it wouldn't be if food coloring weren't added during its processing: It would be green! When it was first introduced to China, Coca Cola was marketed under the name "Ke-kou-ke-la." After thousands of advertisements had been printed, the company discovered that the name translated to "bite the wax tadpole" or "female horse stuffed with wax," depending on the dialect. The name was then changed to "Ko-kou-ko-le," which loosely translates to "happiness in the mouth."
Because soda's are carbonated and their bottles are tightly sealed, the probability that the pressure will build up and make them spray when opened is high; when this happens, removing soda stains from all areas of clothing, furniture, walls, and flooring is possible. Die hard soda drinkers may find themselves having to remove soda stains in the morning, but staining will usually occur in the afternoon or evening, when this beverage is most often consumed.
Tip: Getting the stain out as soon as possible is important: Cola and soft drinks will discolor fabrics as they oxidize.
Soda Stain Removal from Clothes & Fabrics
Solution 1:
1. Sponge as soon as possible with a solution of equal parts alcohol and water.
2. On washable clothes, bleach out remaining stains with an equal mixture of 3 percent hydrogen peroxide and water. Saturate the stain and wait 20 minutes.
3. If the stain is gone, launder as usual. Repeat if the stain remains.
4. Borax is also effective in soda removal. Moisten the spot thoroughly and sprinkle with borax, working well between your thumbs.
5. Flush with water and treat again if necessary.
Solution 2:
For dried stains on fabric –
1. Soften the stain by rubbing glycerin into the cloth.
2. Let stand for 30 minutes. If glycerin is not available, soak the stain in a sudsy liquid enzyme detergent mixture until the stain is loosened.
3. Rinse well in cold water.
4. Rub liquid enzyme detergent into stain. Let stand several minutes.
5. Launder in the hottest water safe for the fabric.
6. If the stain remains, apply a laundry presoak (spot stain remover), then launder, adding a bleach that is safe for the fabric. Test first for colorfastness.
Soda Stain Removal from Carpets & Upholstery
Solution 1:
1. Sponge with mild detergent (1 teaspoon neutral detergent – that is, no alkalis or bleaches – in 1 cup lukewarm water).
2. Next, sponge with vinegar solution (1/3 cup white vinegar in 2/3 cup water).
3. Sponge with clean water.
Solution 2:
1. Blot immediately with an absorbent cloth. Absorb as much liquid as possible.
2. Sponge with a sudsy mixture of liquid laundry detergent and cold water. Continue until you have removed as much stain as possible.
3. Sponge with a clean, damp cloth, then let dry.
4. Vacuum.
5. If the stain remains, repeat steps 2 through 4 as needed.
6. If the stain remains, apply a carpet spotter according to manufacturer's directions.
Sunscreen
Many people apply sunscreen to protect against the sun's harmful rays. But applying sunscreen can be messy, and it's possible that blotches will end up on your clothes or carpet. If so, here's what to do – Sunscreen Spot Removal Solutions
A preparation, often in the form of a cream or lotion, used to protect the skin from the damaging ultraviolet rays of the sun. As earth's atmosphere continues to change, sunscreen lotion may be one of our best protector's against the sun's damaging rays.
Removing sunscreen stains is certainly most common during the summer when the sun is out in full force. Other lotion stains are widespread in winter, when an overwhelming number of people are battling dry skin. Professionals who require frequent hand-washing and water use, like nurses, doctors, homemakers, and restaurant workers (especially in the kitchen), will suffer lotion stains year-round. You may have to remove sunscreen stains from anywhere as it is used on all parts of the body.
Sunscreen Stain Removal from Clothes & Fabrics
Solution 1:
1. Use a dull knife or spoon to remove as much as possible.
2. Blot remaining liquid with an absorbent cloth.
3. Sprinkle salt, baking soda, cornstarch, or talcum powder on stain to absorb excess oil and let stand 10 to 15 minutes, then brush off.
4. Rub colorless dishwashing liquid into stain. Let stand 1 to 2 minutes.
5. Soak in a sudsy mixture of hot water and dishwashing detergent for up to 30 minutes.
6. Rinse the back of the stain well with hot water.
7. Use a dull knife or spoon again to remove any loosened lotion from the fabric.
8. If the stain remains, make a paste of baking soda and water at a ratio of approximately 3 to 1, spread on stain and let dry, then brush off.
9. Apply laundry presoak (spot stain remover) and let stand several minutes.
10. Launder in the hottest water safe for the fabric. For extra-heavy stains, replace half the amount of detergent with baking soda.
11. If the stain remains, repeat steps 3 through 10.
Solution 2:
1. Soak one pad of cotton wool or similar in proprietary grease solvent.
2. With the solvent pad under the stain and a clean pad on top, dab the stain.
3. When some of the stain has transferred to the top pad, turn it over so its clean side is in contact with the fabric and repeat.
4. Change the top pad and continue working until you've completed the sunscreen stain removal.
5. Wash as usual.
Sunscreen Stain Removal from Carpets & Upholstery
Solution 1:
1. Use a dull knife or spoon to remove as much as possible.
2. Blot remaining liquid with an absorbent cloth.
3. Sprinkle the stain with an absorbent powder, such as baking soda, cornstarch, cornmeal, or talcum powder. Let sit for 6 to 12 hours, then vacuum – do not brush the powder.
Or, spray with shaving cream and work into the carpet with an old toothbrush. Wipe with a damp cloth, then sponge with cold water.
Or, dampen with club soda and blot. Repeat as needed.
4. If the stain remains, apply dry-cleaning fluid (be careful not to wet the carpet backing with it) then sponge the stain with a damp cloth.
Or, treat with a carpet spotter according to manufacturer's directions.
Solution 2:
1. Scrape off excess lotion.
2. Sprinkle baking soda, cornstarch, or other absorbent on the stain. Let stand for 10 to 15 minutes, and then vacuum.
3. Using a clean white cloth, sponge the stain with a dry-cleaning solvent.
4. Blot until the solvent is absorbed.
5. If the stain remains, mix 1 tablespoon of liquid hand dishwashing detergent and 1 tablespoon of white vinegar with 2 cups of warm water.
6. Using a clean white cloth, sponge the stain with the detergent/vinegar solution.
7. Blot until the liquid is absorbed.
8. Sponge with cold water and blot dry.
Sweat
Perspiration is the body's way of cooling itself. What's not cool are the spots it can leave behind. Follow these tips to erase unsightly sweat stains – Sweat Spot Removal Solutions
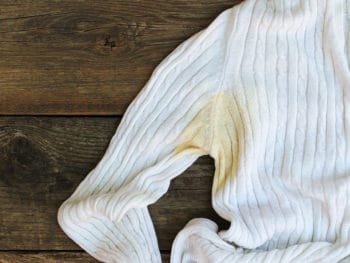
To excrete perspiration through the pores in the skin; perspire. This is one stain that every human being encounters at least once in his or her lifetime. It is truly universal, and it is one of the most irritating stains worldwide. The average person sweats two and a half quarts every day. However, this is nothing when compared with the camel. These humped creatures lose up to 30% of their body weight in perspiration.
The body perspires when it needs to cool down and therefore, summer's heat may increase the need to remove sweat stains. Undoubtedly the most common spot for removing sweat stains is the armpit areas of T-shirts, blouses, and dresses. This stain is the worst because the area is subject to much repeat staining, making the yellowing of the fabric there especially nasty. All pieces of workout clothing are subject to this stain.
Sweat Stain Removal from Clothes & Fabrics
Solution 1:
1. Soak garment for an hour in enough water to cover and 1/4 to 1/2 cup of salt.
2. Wash as normal and line dry in the sunshine. The lower temperature and the sun's bleaching power prevent the sweat from yellowing the garment.
Solution 2:
Fresh sweat stain –
1. Dampen with water.
2. Hold stain over an open bottle of household ammonia.
Old sweat stain –
1. Sponge with white vinegar.
2. Rinse thoroughly, then wash as usual.
Tar
If you've ever had the misfortune of stepping on freshly paved asphalt and sinking into the ground a little, you'll know the tar in asphalt is difficult to remove from shoes and anything else – Tar Spot Removal Solutions
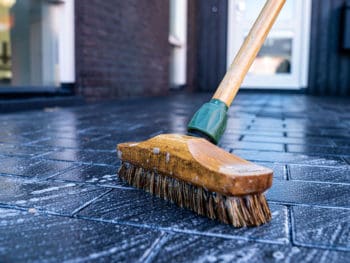
A dark, oily, viscous material, consisting mainly of hydrocarbons, produced by the destructive distillation of organic substances such as wood, coal, or peat. Production and trade in tar was a major contributor in the economies of Northern Europe and Colonial America. Its main use was in preserving wooden vessels against rot. The largest user was the Royal Navy. Demand for tar declined with the advent of iron and steel ships.
For the general public, the need to remove tar stains occurs almost exclusively during the warm months of late spring, summer, and early fall. These substances are sold when they're cold, so there is little risk of them spreading and smearing during the winter months.
However, construction workers may be susceptible to removing tar stains year-round, when roofing, filling potholes, or paving new roads. Tar and asphalt stick readily to shoes, socks, and cuffs of pants. Stains on knees and elbows are also possible, especially following spills from bikes, skateboards, roller blades, and other forms of locomotion.
Tar Stain Removal from Clothes & Fabrics
Solution 1:
1. Freeze with ice cubes until the tar becomes brittle, then carefully scrape with a plastic spatula.
2. Before you begin treating the underlying stain, test a small part of the fabric for colorfastness.
3. For a fresh stain, place the stain face-down on paper towels and sponge it with kerosene.
4. Replace the paper towels frequently to absorb as much tar as possible and to avoid transferring the stain.
5. Apply stain pretreater and launder the article in the hottest water possible with regular laundry detergent.
6. For a hard dry stain, apply petroleum jelly to soften it, then sponge with cleaning solvent.
7. Test for colorfastness and then try non-butane lighter fluid to loosen and remove the tar stain. Use in a well-ventilated area away from heat or flames.
8. If you still can't get the stain out after several tries with kerosene or lighter fluid, apply and reapply laundry pretreater to keep the stain wet for 20 minutes. Follow with a rinse in warm water.
Solution 2:
1. Act quickly before stain dries. Use a dull knife to scrape excess tar from the fabric.
2. Place stain face-down on paper towels. Sponge with cleaning fluid. Replace towels frequently for better absorption.
3. Launder, using hottest water safe for that fabric.
Tar Stain Removal from Carpets & Upholstery
Solution 1:
1. Rub the affected area with ice, then use a dull knife or spoon to remove as much as possible. If tar is dried, rub warm glycerin into it and let it soak until the tar or asphalt is softened.
2. Blot stain gently with an absorbent cloth to remove as much tar and asphalt as possible. Replace cloth as it becomes covered with the stain. Continue until you have removed as much stain as possible.
3. Sponge the stain with eucalyptus oil or turpentine, blotting continuously.
4. Sponge the stain with a sudsy detergent solution, then scrub with an old toothbrush to work solution into carpet.
5. Blot with water to rinse.
6. If the stain remains, apply dry-cleaning fluid or a carpet spotter according to manufacturer's directions.
Solution 2:
1. Scrape off as much tar as possible.
2. Sponge the stain with a dry-cleaning solvent.
3. Blot until the liquid is absorbed.
4. Mix 1 tablespoon of liquid hand dishwashing detergent and 1 tablespoon of white vinegar with 2 cups of warm water.
5. Sponge the stain with the detergent/vinegar solution.
6. Blot until the liquid is absorbed.
7. Sponge with cold water and blot dry.
Tea
It's a wonderful drink. It tastes great and can relax and soothe us. But I'm definitely not soothed when there's a tea spill on my clothes or carpet – Tea Spot Removal Solutions

The dried and prepared leaves of a shrub, Camellia sinensis, from which a somewhat bitter, aromatic beverage is prepared by infusion in hot water. Tea can also be made from a number of other herbs – it is then called "herbal tea." Teas have played a central role in many cultures around the world. In Chinese and Japanese cultures, elaborate ceremonies created thousands of years ago focused on the consumption of tea.
Tea is consumed year-round, and therefore the need to remove tea stains can arise at any time. Hot tea is popular during the colder months, while iced tea is a standard beverage during summer. There is an increase in tea drinking, and consequently removing tea stains, during cold and flu season, when doctors recommend drinking tea with lemon to aid in respiration and to ward off fever.
Tea stains are often found on furniture, jackets and coats, the lap areas of pants, and on the fronts of garments worn on the top of the body. Tea stains can be found morning, noon, and night.
Tea Stain Removal from Clothes & Fabrics
Solution 1:
1. Dab glycerine onto the stain and work in with a clean cloth.
2. Rinse with warm water.
3. Or, soak in a biological detergent and then wash as usual.
Solution 2:
1. Sponge the spot with cool water or soak for about 30 minutes in a basin of cool water.
2. Pretreat with a prewash stain remover.
3. Launder. If it's safe for the fabric, add chlorine bleach to the wash.
Tea Stain Removal from Carpets & Upholstery
Solution 1:
1. Using a paper towel or dry absorbent cloth, blot as much as possible.
2. Add a little water and soak up again until the color is gone.
3. Dab stain with mild detergent (1 teaspoon neutral detergent – that is, no alkalis or bleaches – in 1 cup lukewarm water).
4. If stain remains, dab with methylated spirits.
Solution 2:
1. Mix 1 teaspoon of a neutral detergent (a mild detergent containing no alkalis or bleaches) with a cup of lukewarm water. Blot.
2. Mix 1/3 cup of white household vinegar with 2/3 cup of water. Blot.
3. Repeat step 1.
4. Sponge with clean water. Blot.
Toilet
We all have them. We all have to clean them. There's no getting around that. But most people are not very efficient at cleaning their toilets. And many are stumped by those stubborn rings left around the bowl – Toilet Spot Removal Solutions
To clean a toilet, work from the top down. Start with the tank, move to the seat, clean inside the bowl, and then clean the base. Doing it this way will help you focus. Moreover, the dirtiest part of the toilet – and hence the last place you want your rag to touch – is the base, where the dust mingles with the urine dribbles.
For everything but the bowl, use a dry cloth (nappies work well) and a spray-on bathroom cleaner, preferably one that contains ammonia. There are many makes on the supermarket shelves. Spray the cleaner on the toilet surface and wipe it off with the dry cloth. Keeping the cloth dry makes it easier to wipe everything up. Wet it, and you'll be chasing that moisture around, wringing and re-wringing the rag. Change rags when one becomes soaked with cleaner. Avoid sponges, which work OK but can absorb – and transfer – microorganisms.
Clean the bowl with a rounded bowl brush and cleaner, which is especially kept near the toilet for this purpose. Avoid brushes with metal wire, since the metal can scratch the toilet bowl.
Toilet stain removal is necessary for stubborn rings around the toilet bowl. Use a pumice stone for cleaning toilet stains, available at pharmacies and bath-product stores. (Pumice stones are the same product you use to rub corns off your feet.) Keeping the stone wet, rub it on the ring until it's gone. This works for old rings as well. It will not scratch white vitreous china, which is what most toilets are made of, but it will scratch fiberglass, enamel, plastic and other materials.
To clean around the hardware that holds the seat to the toilet and the toilet to the floor, use a grout brush or an old toothbrush.
Urine
Anybody who has ever tried to potty train a toddler knows about urine – the smell, the color, yuck! These removal techniques will erase any trace of urine stains. If only they could do the same for memories of the potty-training process – Urine Spot Removal Solutions
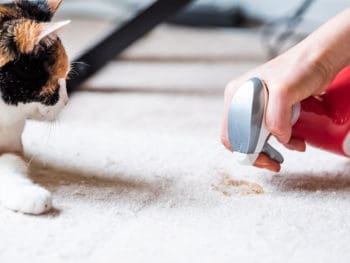
The waste product secreted by the kidneys that in mammals is a yellow to amber-colored, slightly acid fluid discharged from the body through the urethra. Urine stains are usually yellow and are always embarrassing. Whether the spot is made by an excited dog, a crying baby, or oneself when in a drunken stupor, one should remove urine stains as soon as they occur.
Urine stains can happen at any time, especially to young children and, subsequently, their parents. Adults might find themselves removing urine stains after losing control of their bladder's at particular times such as during moments of hilarious comedy and from drinking large amounts of alcohol. One's own urine stains are generally limited to a few areas, including underwear and the crotch areas of pants. With babies, all garments are at risk.
Urine Stain Removal from Clothes & Fabrics
Solution 1:
For fresh urine stains –
1. Lightly blot the mark with a dry sponge to absorb as much excess liquid as possible.
2. Dab area very gently with undiluted vinegar.
3. Sponge with cold water.
Solution 2:
For dried urine stains –
1. Soak and agitate stain in cold water up to 1 hour.
2. Rub a liquid enzyme detergent into stain and let stand for several minutes.
3. For persistent stains, rub with detergent, then soak in cold water for 30 minutes to 1 hour.
4. Launder according to garment label.
5. If the stain remains, launder with a bleach that is safe for the fabric. Test first for colorfastness.
Urine Stain Removal from Carpets & Upholstery
Solution 1:
For fresh urine stains –
1. Blot, then sponge with clean water.
2. Sponge with ammonia solution (1 tablespoon household ammonia in 1/2 cup water).
3. Sponge with mild detergent (1 teaspoon neutral detergent – that is, no alkalis or bleaches – in 1 cup lukewarm water).
4. Finally, sponge with clean water.
Solution 2:
For dried urine stains –
1. Sponge with mild detergent (1 teaspoon neutral detergent – that is, no alkalis or bleaches – in 1 cup lukewarm water).
2. Sponge with vinegar solution (1/3 cup white vinegar in 2/3 cup water).
3. Sponge with ammonia solution (1 tablespoon household ammonia in 1/2 cup water).
4. Repeat step 1.
5. To finish, sponge with clean water.
Water
Who would have thought plain old water could actually stain a carpet or delicate fabric? Well, it can. Small amounts of sediment dissolved in the water can be left behind when a water spot dries, leaving a tell tale stain. Happily, in most cases, water stain removal is no hassle – Water Spot Removal Solutions
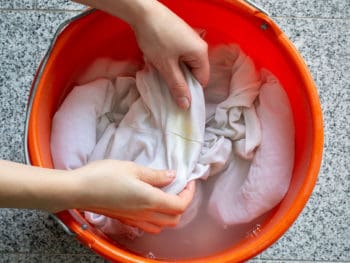
Spots left by water on delicate fabrics such as silk, rayon, or fine wool. It only takes 1 errant drop of water to damage a fine silk blouse. Water is usually the substance you use to remove stains, thus it seems paradoxical to concern ourselves with removing stains incurred by this very agent.
The period of highest risk in having to remove water stains is during the seasons when weather is most active – in moderate climates usually winter and spring. Water stains can present themselves anywhere on a garment if acquired through ironing. If acquired during a rain or snow storm, removing water stains from the fronts and backs of shirts, pants, dresses, sweaters, coats, and jackets is most likely.
Water Stain Removal from Clothes & Fabrics
Solution 1:
1. Fill a kettle with water and bring to a boil. Cover the spout with cloth to prevent water droplets from splattering out.
2. Once the water is boiling, hold the stained fabric over the steam until it becomes damp, but not wet.
3. Shake and press the fabric while it is still damp. Rub the affected area with a spoon or other dull surface.
Water Stain Removal from Carpets & Upholstery
Solution 1:
1. Mix a solution of half water and half white vinegar.
2. Moisten a clean white terry towel with the water/vinegar solution.
3. Rub the towel gently over the water spot. The objective is to get the tips of the carpet fibers wet, not to soak the carpet itself.
4. Allow the carpet fibers to dry. If the stain is reduced but still noticeable, repeat the water/vinegar process until the stain is gone. Allow the fibers to dry between each application.
Wine
Dinner with family and friends is not complete without a good wine to complement a wonderful meal. There may be that little fear in the back of your mind that one of your guests may spill wine and create a stain – Wine Spot Removal Solutions
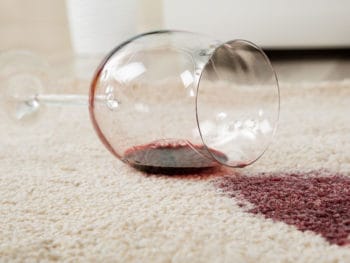
White Wine Stain Removal
If there's one thing that every wine drinker experiences over the years, it's spilling wine. You knock over bottles, you knock over glasses, wine ends up all over the place. White wine isn't bad. Below are solutions on how to remove wine stains from clothes & fabrics and removing wine stains from carpets & upholstery.
Pale yellowish wine made from white grapes or red grapes with skins removed before fermentation. Sauvignon Blanc, Chardonnay and Chenin Blanc are popular varietals. White wine is often best served chilled. White wine is most popular during the summer months and is best drunk in conjunction with white meats such as poultry and fish. Champagne is the customary drink at any big celebration, especially New Years Eve.
Since good times aren't limited by season, neither is removing wine stains. This stain is found anywhere on the fronts of shirts and dresses, as well as splashed on pant legs and skirts. The white wine stain is a member of that class whereby the times of acquisition and the times of discovery are very different.
White Wine Stain Removal from Clothes & Fabrics
Solution 1:
1. Rinse the spill immediately.
2. Apply an undiluted neutral detergent and a few drops of white vinegar.
3. Rinse.
4. Launder washables in warm water. Dry cleaning garments should be taken to a professional if any stain remains.
Solution 2:
1. Rinse back of stain well with cold water or club soda.
2. If the stain remains, rub with dishwashing liquid or liquid enzyme detergent. Let stand several minutes.
3. Rinse well with cold water.
4. Launder according to garment label.
White Wine Stain Removal from Carpets & Upholstery
Solution 1:
1. Sponge with mild detergent (1 teaspoon neutral detergent – that is, no alkalis or bleaches – in 1 cup lukewarm water).
2. Next, sponge with vinegar solution (1/3 cup white vinegar in 2/3 cup water).
3. Repeat step 1.
4. Finally, sponge with clean water.
Solution 2:
1. Spray with soda water.
2. Soak up liquid with a towel or absorbent paper.
3. Sponge with a borax solution is the carpet has stained. Alternatively, sponge with vinegar.
Red Wine Stain Removal
You're at a party and someone accidentally bumps into you, spilling your glass of red wine all over the front of your blouse or shirt. What do you do? Don't cry over your spilled wine and don't panic. Below are the solutions to remove wine stains from clothes & fabrics and removing wine stains from carpets & upholstery.
Wine having a red color derived from skins of dark-colored grapes. Merlot and Cabernet Sauvignon are popular varieties. The strong, bold flavors of red wine produce just as strong and unwieldy stains. Though red wine is served year-round, most people prefer to drink the heartier red wines in fall and winter.
You may be required to remove wine stains anywhere on the fronts of shirts and dresses, as well as pant legs and skirts as the hours grow later and splashes occur.. During a particularly engaging dinner party or gathering of friends, a red wine stain may not be detected until later in the evening, or even the next morning, depending on the amount consumed.
Tip: Learn to pour like a wine steward, slowly twisting the bottle neck to the side as you finish pouring so that drips will stay inside the bottle. Instead of laying your cork on the tablecloth, use a dish or ashtray to prevent unnecessary red wine stains.
Red Wine Stain Removal from Clothes & Fabrics
Solution 1:
Fresh red wine stain –
1. Sprinkle a red wine spill immediately with a liberal amount of salt.
2. Allow the salt to absorb the wine, and then rinse in cool water.
3. Apply liquid laundry detergent and rinse in cool water.
4. If the stain remains, apply a paste made from bleach-enzyme laundry soap such as Biz (mix according to package directions), soak for 30 minutes in an all-fabric bleach, and then launder.
Dried red wine stain on durable fabric –
1. For dried stains on durable fabrics, such as a tablecloth, hold the stained area over a bowl and cover with salt.
2. Pour boiling water over the salt until the stain disappears.
Dried red wine stain on other fabrics –
1. On other fabrics, soak with a few drops of white vinegar and blot, or try soaking with a solution of hydrogen peroxide (a mild bleach) and a few drops of ammonia.
Solution 2:
1. Blot with paper towels or a dry cloth.
2. Sprinkle with white wine, which is acidic, to neutralize the stain, or water, and blot again. Remove the remaining stain with a clean cloth and methylated spirits.
Red Wine Stain Removal from Carpets & Upholstery
Solution 1:
1. Blot up as much wine as possible with an absorbent cloth.
2. Saturate the stain with soda water or cold water.
3. Repeat steps 1 and 2 as needed.
4. If red wine stain remain, make a paste of borax or baking soda and water at a ratio of approximately 3 to 1. Smear paste onto stain with an old toothbrush and let dry.
5. Vacuum.
6. Repeat until no more stain can be removed.
7. If the stain still remains, treat with a carpet spotter.
Solution 2:
1. On rugs and carpets, immediately cover the spill with a generous amount of salt.
2. Allow it to dry, and then vacuum.
Have you reached stain removal success? I hope so!
How To Clean A Stain Brush
Source: https://www.mtoclean.com/stain-removal-a-z/
Posted by: fowlerpind1987.blogspot.com
0 Response to "How To Clean A Stain Brush"
Post a Comment